

Hey everyone, thanks for clicking on this link, I tried to go for the longest title I could! But stay with me on this one! There is a lot to take in! I really should have blogged about this in smaller batches as progressed, but I didn’t so this is going to be a bumper post…… feel free to scroll down to the tech parts further down. I am just going to run through what I have been up to in terms of producing a robot arm, and why!

To kick off with the why, in my opinion, an IoT project such as this enables me to get deep understanding of a lot of areas that go into the end to end solution deployment, with my vision for this to be a fully controlled Robot Arm deployed and managed by Azure IoT and running on cloud services! This will aid my learnings of the areas concerned, so that covers the why!!!
Im going to try and keep this as concise as possible, but for those of you that have been following my social media, you will know that I have been flowing Peter Gallagher‘s instructions in his Github Repo on building an application to control a 3D printed robot arm. (here: pjgpetecodes/rpirobot: A Raspberry Pi Robot Arm using .NET 5 (github.com)). This is where is all started for me! I will break up the process to get me top the point of where I am now with looking to containerise the Blazor WebASM web app that controls the arm!
So…… here we go, I would bring you all up to date with the plan that I have and where I have go to…….. I will do my best to do a more detailed post on the process of building my Robot arm, but in short, I took Pete’s instructions and went off to thingiverse.com and found a slightly bigger robot arm that takes 4 x slightly larger servo motors to control it…… you can find the STL files to 3D print that here: EEZYbotARM MK2 by daGHIZmo – Thingiverse
Prereqs, you will need:
- A Raspberry Pi
- A 3D Printer (or buy a robot arm kit off Amazon!)
- Various M3 and M4 nuts and bolts ranging from 15mm-45mm in length (and some M4 threaded bolt)
- Servo motors, I used 3 x MG995 and 1 x SG90
- Servo Kit – I used the Monks Makes Servo 6 kit MonkMakes that I purchased from The Pi Hut
- 25 x 6mm Ball bearings
- 1 x 6 x 17mm Bearing
- A few connecting wires and a bread board with GPIO Card
- A PC with VS Code (or your code IDE of choice)
- Docker Desktop
- A heap load of patience!! 🙂 (Not an exhaustive list, you will also need an amazon account and the ability to purchase items on the fly as you realise that you
needwant them!!.)
The Robot Arm Build Process
After taking the time to 3D print all of the parts I set to work with the build, this isn’t going to be a step by step process but it should give you a good idea on what was involved, there are detailed instructions on the build on the thingiverse page listed above. I built the arm over a few days as I realised I needed a few different sized bolts etc. Here are a few pictures of the build process…


Once the Robot Arm was all mechanically built, it was time to wire it up to the Raspberry Pi with the Servo Six kit!!
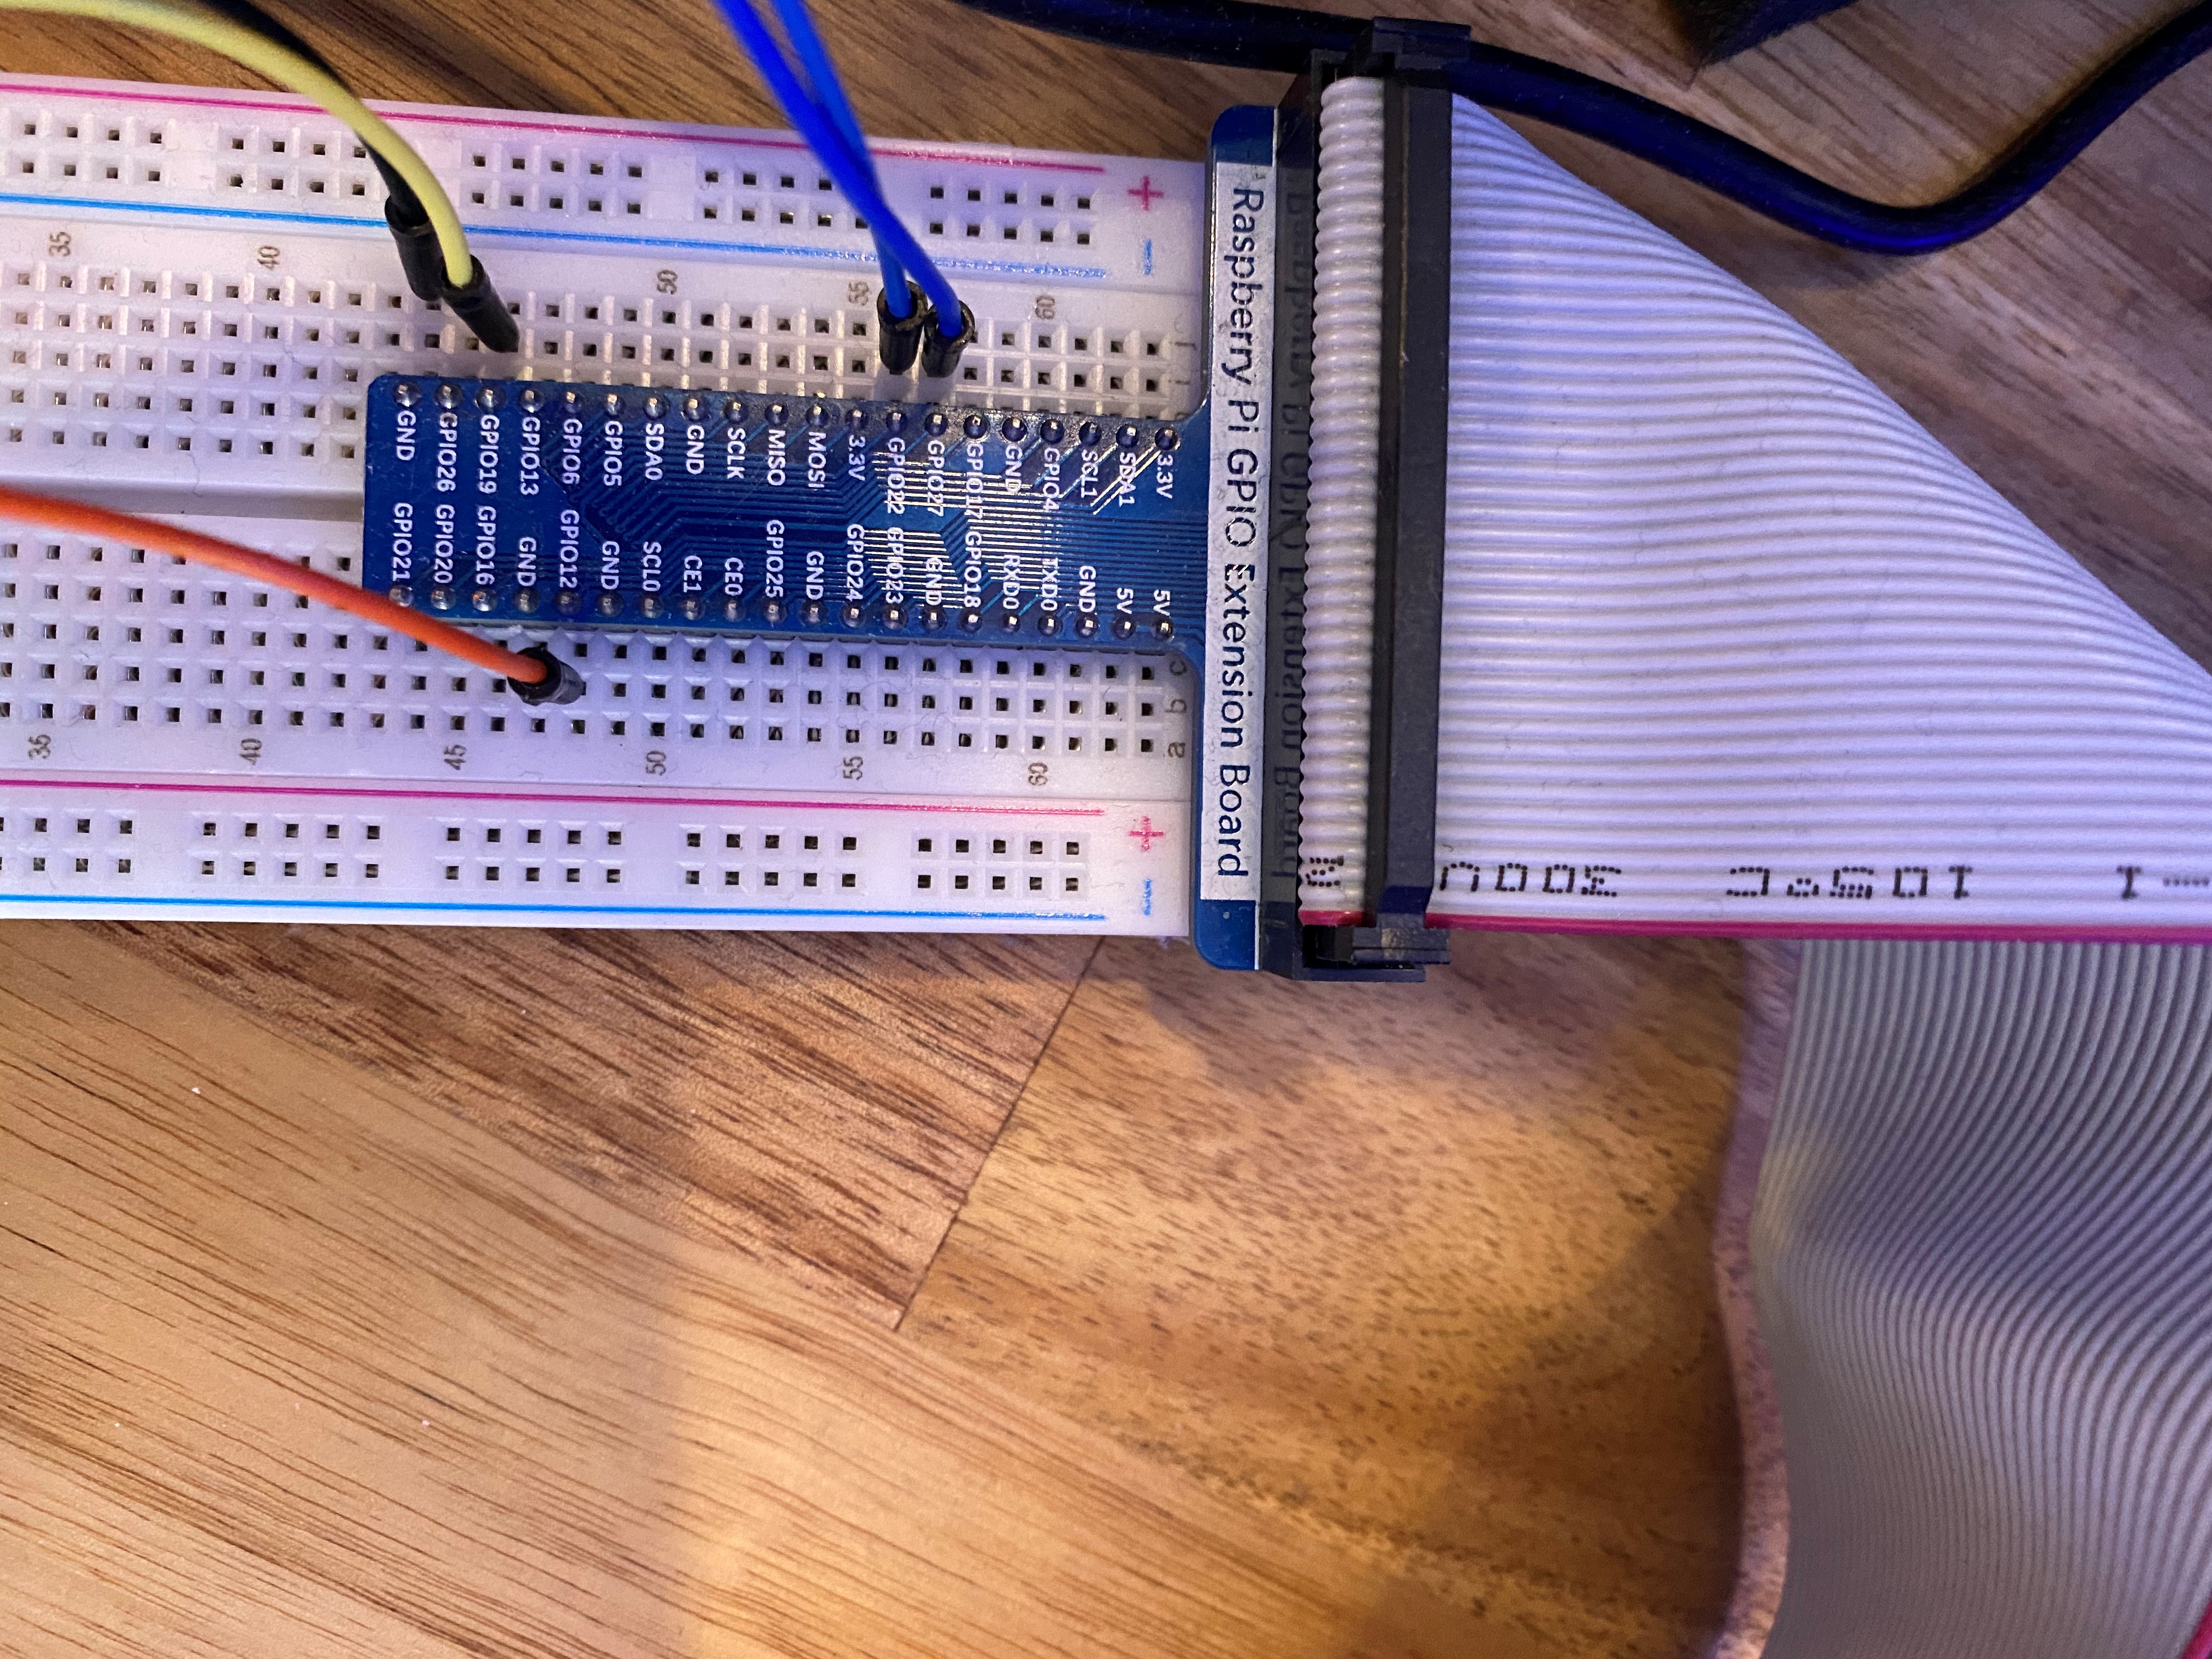
The 4 servos hooked up to my GPIO Pins:
Servo1: GPIO12, Servo2: GPIO19 (Hardware PWM)
Servo3: GPIO22, Servo4: GPIO27 (Software PWM)
Read up a bit on PWM, but basically the Raspberry Pi only has the ability to offer 2 x Hardware PWM Channels, which does really affect the ‘smoothness’ of the operation of the arm. Basically the Software defined PWM has to contend with other traffic on the chip and ‘gets confused!’, that probably my layman’s way of explaining it!

Next we hook up the motors to the Servo six card, as you might guess by the name, this card can control upto 6 servos and has an attached battery pack as current needs to be greater than can be provided by the Pi, (plus you wouldn’t want to over load the Pi and do it some damage!)
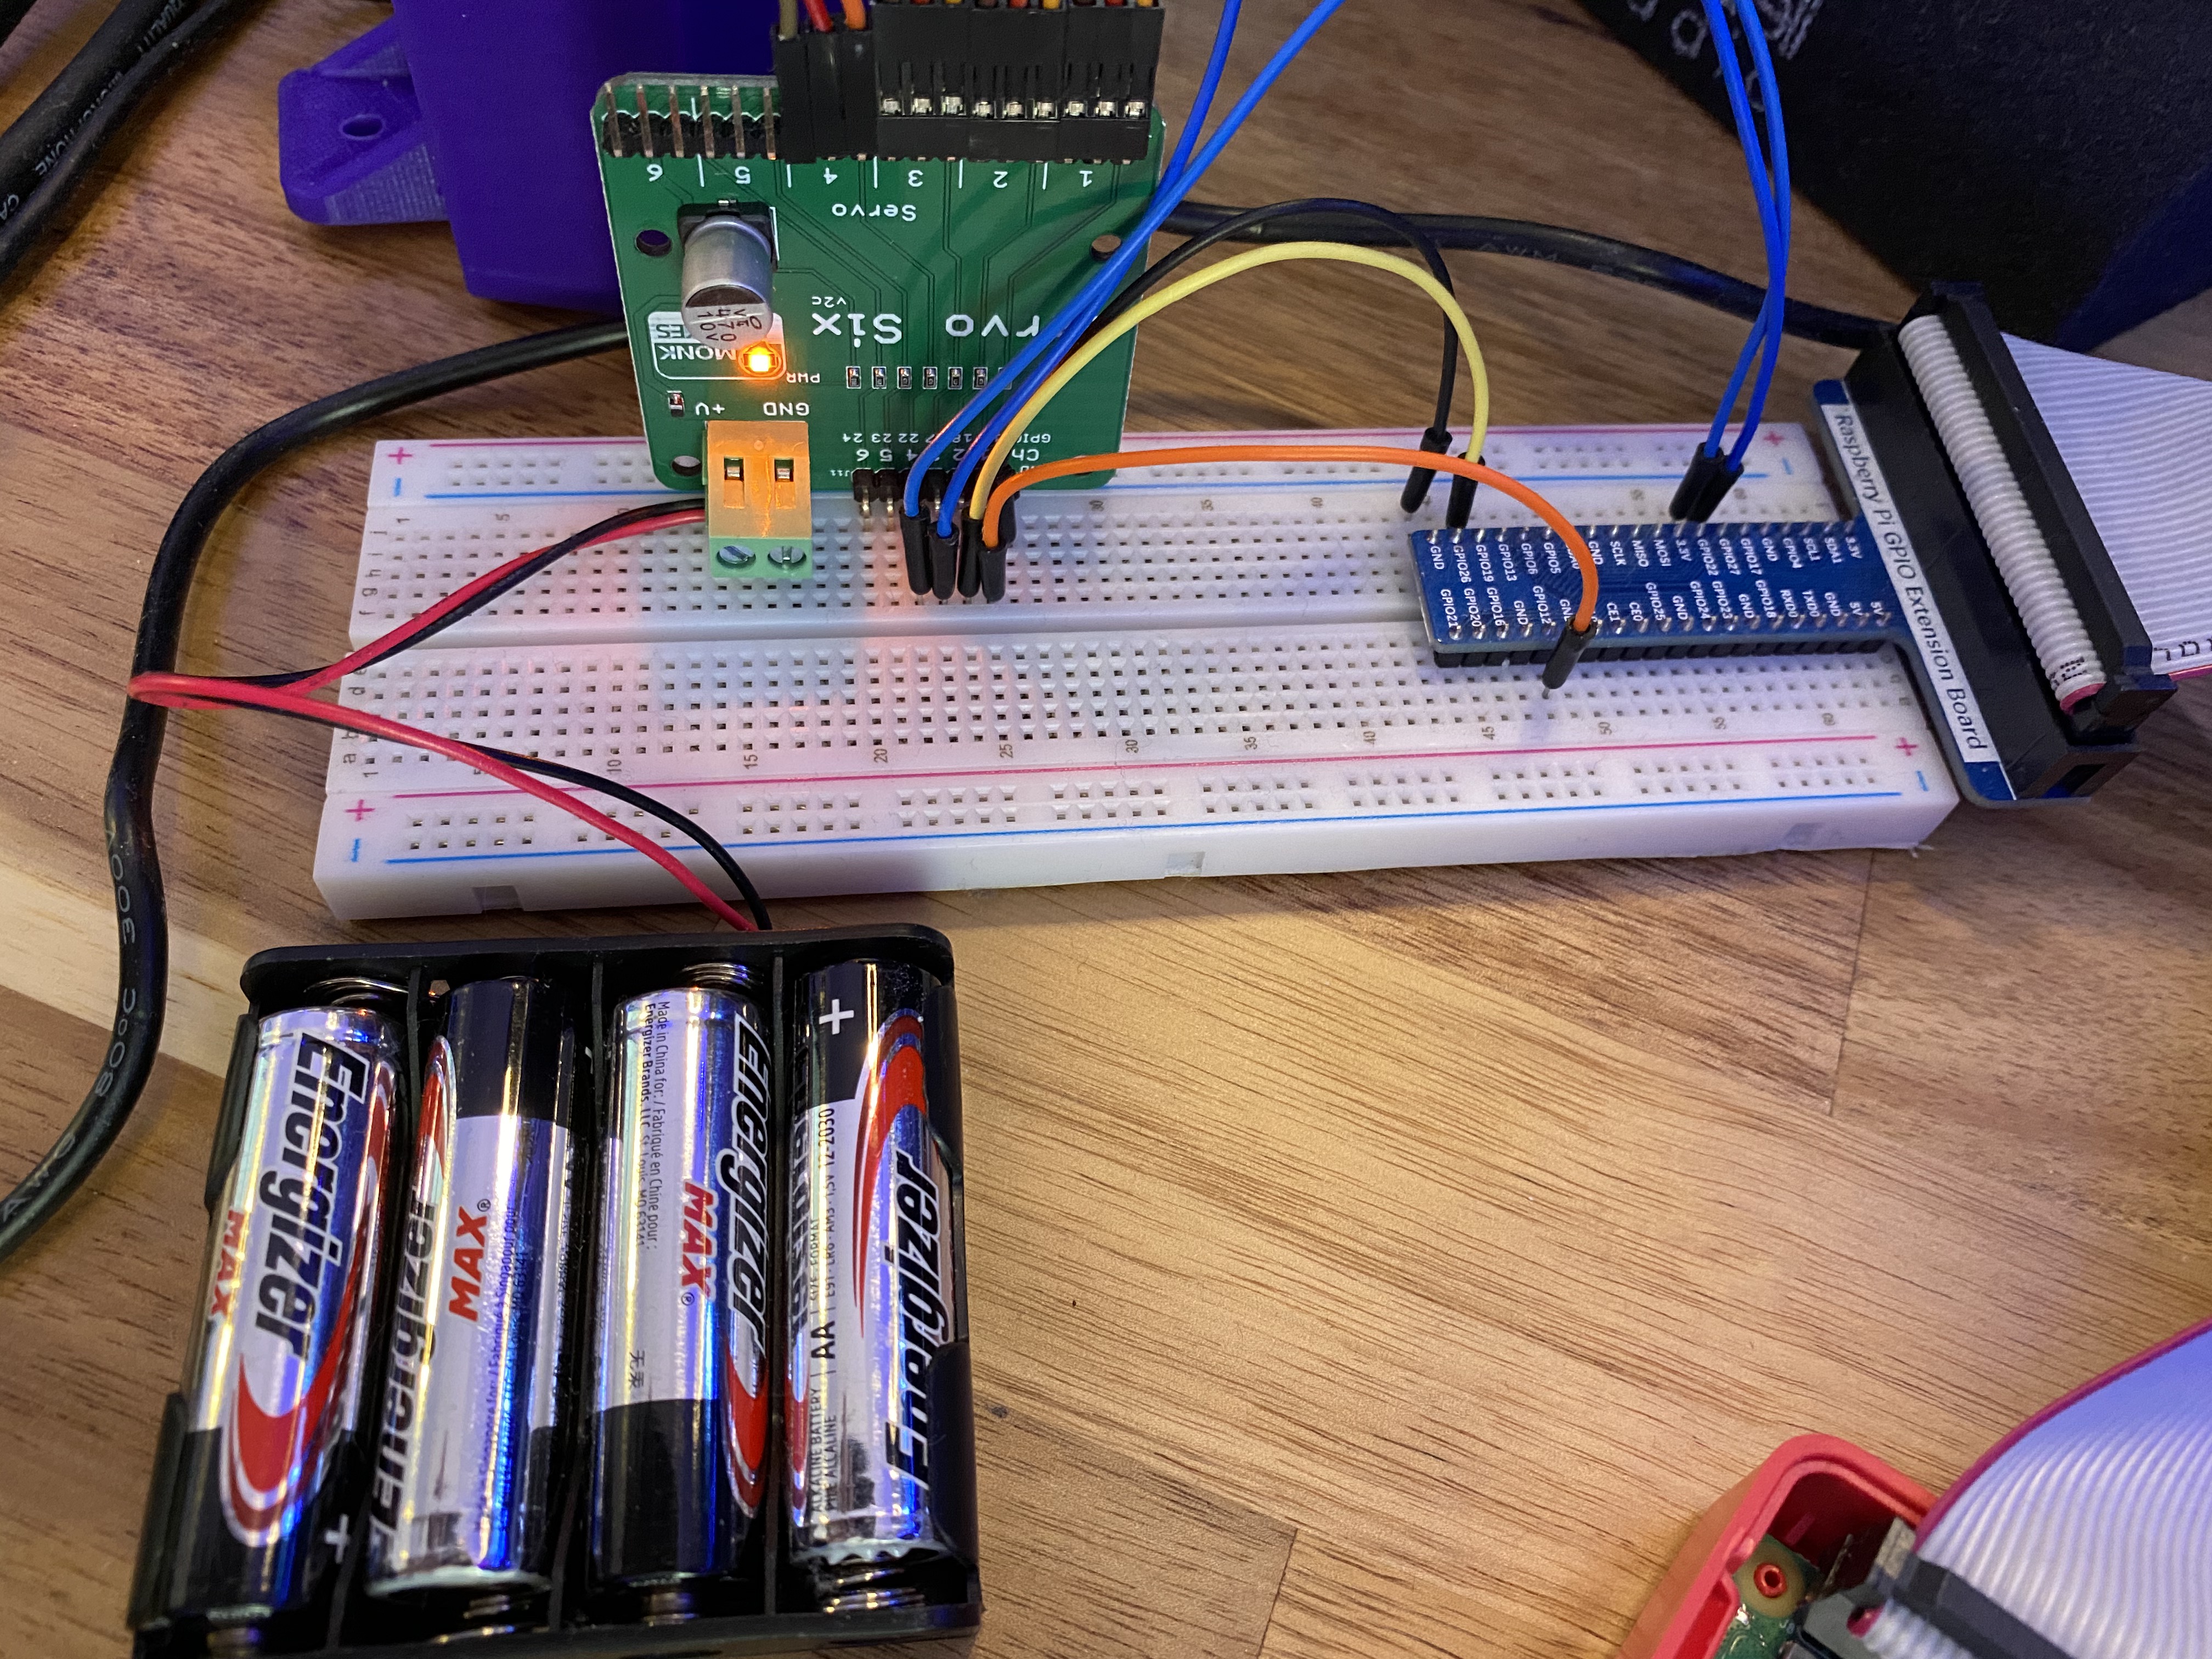
That’s, it, we are all wired up. As I mentioned above, I took Pete’s wiring diagram off the GitHub and modified it slightly to include the 4th motot, and I used different Pins: rpirobot/08-build-circuit-servos.md at main · pjgpetecodes/rpirobot (github.com)
The Code – The Robot Arm Firmware
Ok so the key part to this is that there are distinctly 2 sets of code we have to manage, 1) the Blazor WASM code, and 2) the code to run the Arm, i.e. the firmware.
This section I don’t propose to cover much detail other than to say I have a copy of both sets of code in this repo: jonnychipz/robotarm (github.com)
Have a look through the main ‘Program.cs’ file and you will see some familiar points, such as the setting up of the 4 Servo motors in code and initiating them:

You have to play around with the values of the PWMChannel and the SoftwarePWMChannel, depending on the motors you use, it really is a bit of trial and error.
You can see that we are starting our 4 motors in code as well as connecting to our SignalR chat hub which is pointing to a private IP and port, this will become apparent when we containerise our application in a few sections time! But to put it simply, this URL is how the firmware picks up the messages it needs to move the motors! (From our BlazorWASM web app!)
To run our firmware we can use: dotnet run command and we can see when our firmware is ready to receive messages. Note that we are remote ssh onto the raspberry pi to run this command:

The Code – Bazor WASM Client/Server
So, this is the crux of the client side interaction. I won’t go into the why’s and ways of Blazor Web Assembly, other than to say that this application is completely running on the client in a modern chromium browser such as Edge or Chrome etc.
Agasin in the repo: jonnychipz/robotarm (github.com) you can find a copy of my latest version of the Web App which I will give you a couple of screen shots here:
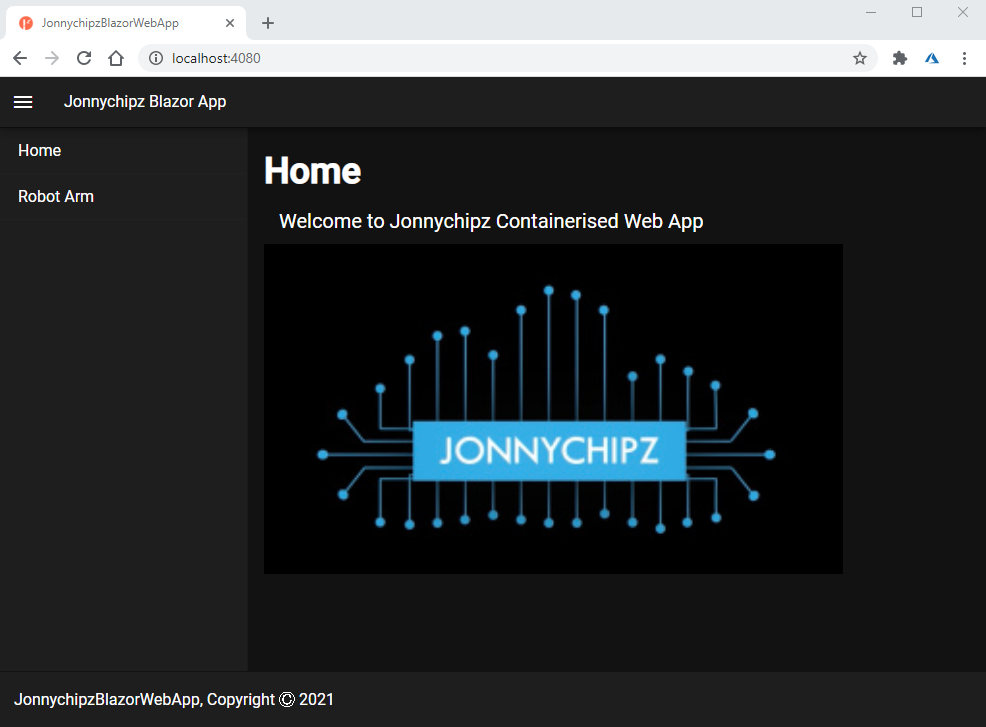

As you can see, the basic remit of this client side Blazor WASM is to offer the control to a user for each of the servo motors! Note the URL of this app, does that look familiar with the SignalR Hub connection in our firmware from earlier? Hint:

So our firware is talking directly to the Blazor ‘Server’ side, which is of course where our Client is hooked up to! SO when we move the sliders, SignalR is keeping that connection tunnel open to our server to drop messages to a chat hub, which we can see if we look at our Blazor Client ‘RobotArm.razor’ page:


This is an example of servo 4, and we can see that this is a public variable called ‘servo4, when the slider is moved, this value is bound to the ‘servo4’ variable, and in turn when the variable is ‘set’ is performs this function call (analogous to the old Remote procedure call RPC ish!), with the client sending a message to the Hub to call a function called ‘SendMessage’ with the arguments ‘servo4’ and the value of the slider.
So, if we then take a look at our ‘Chathub.cs’ file under our Server/Hubs folder, we can see that we have one funciton defined:

Low and behold, that funciton is called ‘SendMessaage’ which is what our client was calling!
If we look into the actions of this function, it is sending a message to ‘all’ clients (which our raspberry Pi Robot arm firmware is a client). That message is calling a function called ‘ReceiveMessage’ with the ‘user’ (servo4) and ‘message’ (Slider value) being passed to the firmware, so shall we have a look for this function in the robot arm firmware? Yeah I thought so…….. 🙂

There we have it, the completed path, we can see that our firmware is waiting for an ‘Action’ to kick off a function, when our Hub Conneciton receives a message it passes the arguments into our funtion as parameters and we have a bunch of if statements, we could have used a select statement here, but hey, this paints a good picture of the complete story!
The message is received and it calls a function called ‘MoveToAngle’

Which basically uses the value that has been passed from our slider to move the servo to that particular angle!! and voila it also writes out a message to our console window!
At this point, we have a working firmware and Client/server BlazorWASM.
Now, my thoughts here are that we want to publish this application somewhere (oh and by the way, i’m ignoring SSL for the moment on my web app just to make things a little simpler).
So the next stage I thought I would move onto is publishing my BlazorWASM application as a Docker image and then finally run this image in a container! My main reason for this (which I will probably cover off in a different blog post is to eventually look at publishing my image into an Azure Web App service plan and run it from there!)
Ok, one step at a time, let’s look at creating our Docker image!!
Docker Compose / Build / Publish
Ok so, Docker, again I’m not going to drill into the why’s or what’s of Docker here, I’m using this purely as an illustration of how you might package up a Blazor WASM application into an image so that you can do something with it!
In a nut shell, this process comes down to 2 files, which are all available in the repo: jonnychipz/JonnychipzBlazorWebApp (github.com)
Sorry for so many repos, but I’m trying to keep things separated as I learn and play with these things for myself!
So, the first file we need is the ‘docker-compose.yml’ file that looks like this and is in the root of our BlazorWASM code:
version: '3.4'
services:
  jonnychipz-blazorwasm:
    image: jonnychipz-blazorwasm
    build:
      context: .
      dockerfile: server/Dockerfile
    ports:
      - 4080:80
      - 5443:443
So, quite straightforware yeah? We have a file that is basically saying, take a Dockerfile from the Server folder, and build the image, oh and then if you need to make a container, just punch a few ports from the host side to the image running in the container (4080->80 for example).
Ok so, lets have a look at our docker file in our ‘Server’ folder:
FROM mcr.microsoft.com/dotnet/aspnet:5.0 AS base
WORKDIR /app
EXPOSE 80
EXPOSE 443
FROM mcr.microsoft.com/dotnet/sdk:5.0-focal AS build
WORKDIR /src
COPY ["/server/JonnychipzBlazorWebApp.Server.csproj", "server/"]
RUN dotnet restore "server/JonnychipzBlazorWebApp.Server.csproj"
COPY . .
WORKDIR "/src/server"
RUN dotnet build "JonnychipzBlazorWebApp.Server.csproj" -c Release -o /app/build
FROM build AS publish
RUN dotnet publish "JonnychipzBlazorWebApp.Server.csproj" -c Release -o /app/publish
FROM base AS final
WORKDIR /app
COPY --from=publish /app/publish .
ENTRYPOINT ["dotnet", "JonnychipzBlazorWebApp.Server.dll"]
OK, so a few more lines of code here which can be explained as follows:
- (Line 1-2) Take a copy of Microsoft’s ASP.NET 5.0 image, and call it ‘base’, create and use /APP as your working directory, and allow Ports 80 and 443 to be exposed to the image.
- (Line 5-10) Take a copy of Microsofts DOTNET 5.0 (focal/ubuntu) image and call it ‘build’, create and use ‘/src’ as your working directory, copy all my Server code into a folder called ‘Server’, run a DotNet restore, copy the remaining files, then change my working directory up one level to ‘/src/server’.
- (Line 11) Build and release my app into a folder called ‘/app/build/’
- (Line12-13) Create a new image from my ‘build’ image and call it ‘publish’ then publish my application to a folder called ‘/app/publish’
- (Line 14-17) Finally, take my image ‘base’ and call it ‘final’, set the working directory to ‘/app’, copy all the content from ‘publish’ image into my ‘/app/publish’ folder, then set an entry point for the application to my app dll!
So basically with these two files, the ‘docker-compose.yaml’ and the ‘server/Dockerfile’ we can run the following command at the root of our code and have the application automatically built, published and packaged into an image, oh and we can also have Docker-Compose run it in a container for us! Let’s have a look!!
The command:

Simple eh?! 🙂
The Running Container
Ok so I thought that rather than trying to document out the process here, I would incorporate a quite few minute video showing the build process and to show my running container on my Docker Desktop.
This project is very much a work in progress and the next move would be to look at pushing the image into Azure Container Registry and deploying an Azure Web App with that image running. Maybe in the future I may look to package all of this code up and deploy it all via an Azure DevOps or GitHub Actions pipeline!
I hope you enjoy and have got something from this post, please feel free to reach out to me and please don’t forget to like and subscribe to my YouTube channel!
Next Post to check…


Thanks for making this process very easy, I have followed the steps and I can control my robot with the app uploaded to azure, what happens is that it is accessible to anyone and I want to restrict access, I have half achieved it with azure active directory, What happens is that the firmware of the robot does not have access, what is the best way to authenticate the robot in the azure active directory?
LikeLike