

In this blog post I will be utilising Visual Studio Code (VSCode) to create a Python function that responds to HTTP requests. I will aim to test the code locally and then deploy it into the Serverless environment of Azure Functions.
This run through will cost a small amount in an Azure Subscription, so please make sure you have the following:
Configure your environment
Before you get started, make sure you have the following requirements in place:
- An Azure account with an active subscription. Create an account for free.
- Node.js, required by Windows for npm. Only Active LTS and Maintenance LTS versions. Use the
node --versioncommand to check your version. Not required for local development on macOS and Linux. - Python 3.8, Python 3.7, Python 3.6 are supported by Azure Functions (x64).
- Visual Studio Code on one of the supported platforms.
- The Python extension for Visual Studio Code.
- The Azure Functions extension for Visual Studio Code.
Creating my local project
I will use VSCode to create a local Azure Functions project in Python. Later I will look to publish the Function to Azure.
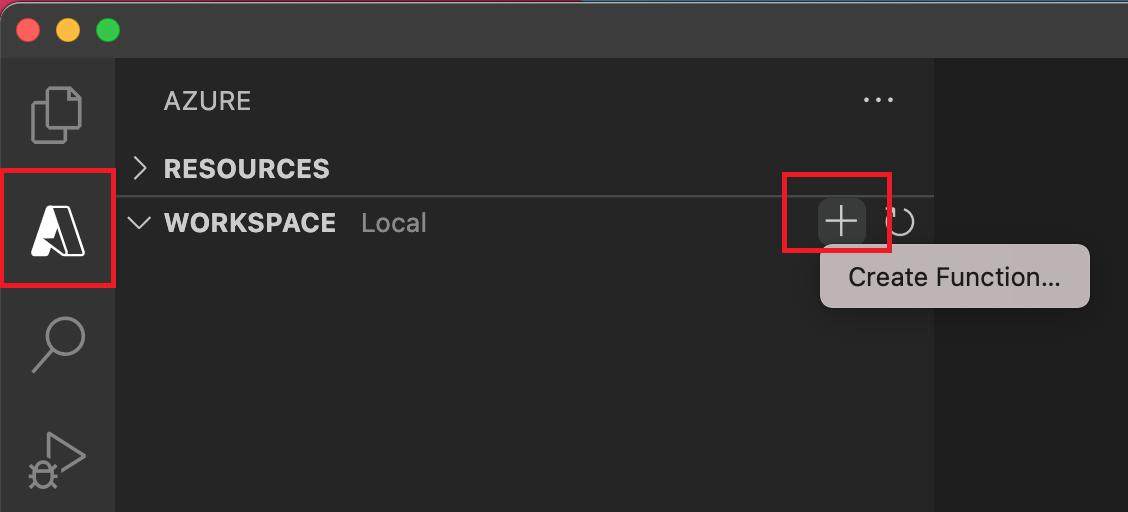
- Click on the Azure icon in the Activity bar, then in the Azure: Functions area select Create new project…
2. Choose a directory location for your project workspace and choose Select.

3. Provide the following information at the appropriate prompts:
- Select a language: Python
- Select a Python alias to create a virtual environment, if path not shown then type the full path to your Python binary.
- Select a template – Choose HTTP Trigger
- Provide a function Name – JonnychipzTest
- Authorisation Level – Choose Anonymous, this enables anyone to call the function endpoint. For more information on authorisation levels see: Authorisation Keys.
- Select how you would like to open your project – Choose Add to workspace.
Run the function locally
VSCode integrates with the Azure Functions Core tools, this enables the ability to run the function locally before it is published to Azure.
- Press F5 to call the function and start the app project. The output from the core tools is displayed in the Terminal panel.
- If the Azure Functions Core Tools are not already installed, select Install at the prompt. Once installed your app will start in the Terminal panel and you should be able to see the endpoint of your HTTP-triggered function running locally.

3. With Core Tools running, navigate to the following URL to execute a GET request, which includes ?name=Functions query string.
4. A response is returned which looks similar to the below:

5. Information about the request is shown in the Terminal panel.

6. Press Ctrl+C to stop the Core Tools and disconnect the debugger.
Once we have verified that all runs locally, we can us VSCode to publish to Azure
Sign in to Azure
Before you can publish your app, you must sign in to Azure.
- If you aren’t already signed in, choose the Azure icon in the Activity bar, then in the Azure: Functions area, choose Sign in to Azure…. If you don’t already have one, you can Create a free Azure account. Students can create a free Azure account for Students.

If you’re already signed in, go to the next section.
- When prompted in the browser, choose your Azure account and sign in using your Azure account credentials.
- After you’ve successfully signed in, you can close the new browser window. The subscriptions that belong to your Azure account are displayed in the Side bar.
Publish the project to Azure
In this part we will create a function app and related resources in your Azure Subscription and then deploy your code.
Please note that publishing to an existing function will overwrite the content of that app in Azure.
- Choose the Azure icon in the Activity bar and then in the Azure: Functions area click on the Deploy to function app… button.

2. Provide the following information at the prompts:
- Select folder: Choose a folder from your workspace or browse to one that contains your function app. You won’t see this if you already have a valid function app opened.
- Select subscription: Choose the subscription to use. You won’t see this if you only have one subscription.
- Select Function App in Azure: Choose
+ Create new Function App. (Don’t choose theAdvancedoption, which isn’t covered in this article.) - Enter a globally unique name for the function app: Type a name that is valid in a URL path. The name you type is validated to make sure that it’s unique in Azure Functions.
- Select a runtime: Choose the version of Python you’ve been running on locally. You can use the
python --versioncommand to check your version. - Select a location for new resources: For better performance, choose a region near you.

3. When completed, the following Azure resources are created in your subscription, using names based on your function app name:
- A resource group, which is a logical container for related resources.
- A standard Azure Storage account, which maintains state and other information about your projects.
- A consumption plan, which defines the underlying host for your serverless function app.
- A function app, which provides the environment for executing your function code. A function app lets you group functions as a logical unit for easier management, deployment, and sharing of resources within the same hosting plan.
- An Application Insights instance connected to the function app, which tracks usage of your serverless function.
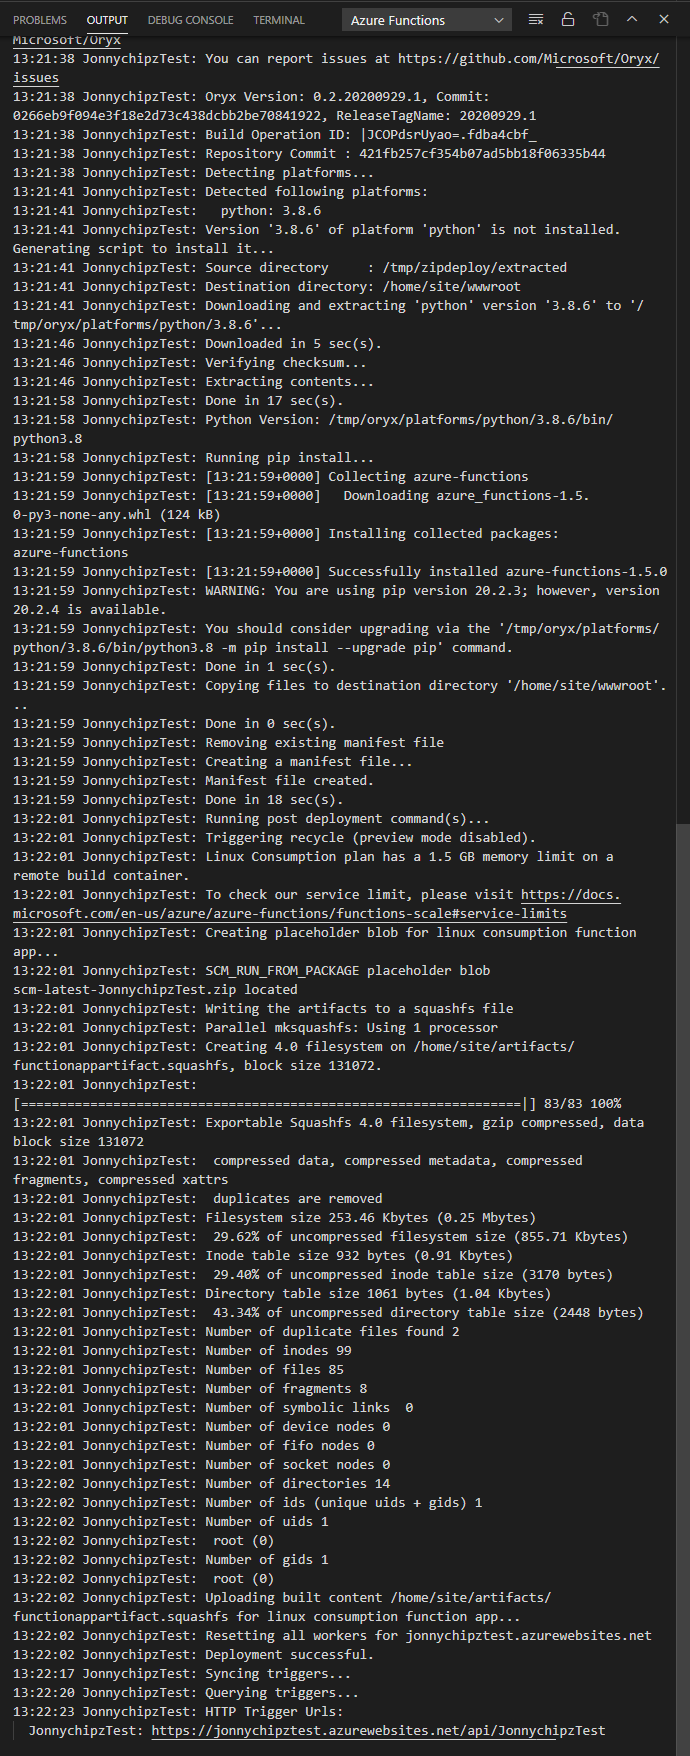
A notification is displayed after your function app is created and the deployment package is applied.

4. Select View Output in this notification to view the creation and deployment results, including the Azure resources that you created. If you miss the notification, select the bell icon in the lower right corner to see it again.

Run the function in Azure
- Back in the Azure: Functions area in the side bar, expand the new function app under your subscription. Expand Functions, right-click (Windows) or Ctrl on JonnychipzTest, and then choose Copy function URL.

2. Paste this URL for the HTTP request into your browser’s address bar, add the name query string as ?name=Functions to the end of this URL, and then execute the request. The URL that calls your HTTP-triggered function should be in the following format:
https://jonnychipztest.azurewebsites.net/api/JonnychipzTest?name=FunctionsThe following example shows the response in the browser to the remote GET request returned by the function:

Clean Up Resources
If you no longer require these resources, ensure you log on to your Azure Subscription and find your resource group and delete it from the portal.
You have created your first Python function in Azure Functions utilising VSCode!

Need some assistance with a serious situation
LikeLike