
Hey everyone, ok so for the last 2 days as part of my job I have been involved in an intense learning journey all around Azure Arc to learn all about onboarding, and monitoring on-prem resources as Arc Enabled resources within Azure.
To start off, the scope for these two days has been brilliantly put together by the OCP team within Microsoft, so kudos for pulling together a series of resources and learning paths to enable us to work through in order to increase our knowledge on this ever growing area of Azure.

The full detail of this hack is available publicly at the following location: https://www.azurecitadel.com/arc/servers-hack/
And it covers these key areas of integration:

The agenda for the two days was loosely structured as aiming to complete the first 4 challenges: Manual Onboarding, Azure Policy, Scale Onboarding and Monitoring on the first Day, then looking at the Management, Governance and Integration on Day 2. We also had some great interwoven presentations on Azure Stack HCI and Azure Monitor.
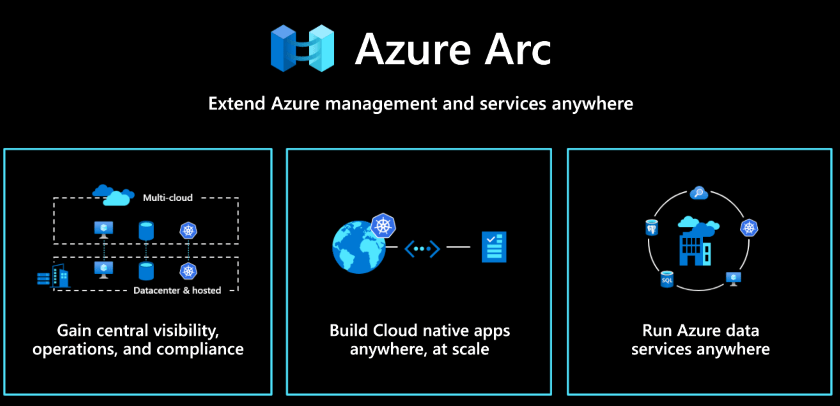
Overview of Azure Arc


So Day 1 – Lets Go!
The first things to get comfortable with in order to utilise the resources provided are to ensure your machine prereqs are all in place, so installing and configuring your workstation should be something you familiarise yourself with in order to get the most out of the hack content as well as having your own Azure subscription to sandbox some of the concepts.
The prereqs are defined here: https://www.azurecitadel.com/arc/prereqs/
Its also a good idea to generally be comfortable with your set up and that it includes a code editor of choice (VS Code or Windows Terminal in my case), installations of WSL, Git, Terraform and Ansible is also recommended.
The first this would be to clone or fork this GHitHub Repo: https://github.com/azurecitadel/arc-onprem-servers as this GitHub Repo contains a set of Terraform modules/scripts to deploy a psuedo ‘on-prem’ infrastructure into a resource group created in Azure and the README.MD contains a good overview of what will be configured and how to modify the variables file to include the number of servers you want to ‘deploy’.

Task 1 : Manual Onboarding into Arc
This task is all about running through the Azure Portal to create your onboarding script that will install the Arc Agent onto your Servers (Windows or Linux) in order that they are onboarded into our ‘arc-hack’ resource group.
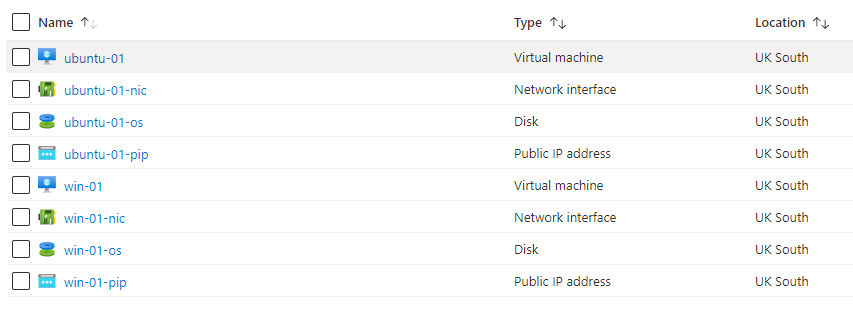
If you were successful in running the terraform script to create 1 x Windows and 1 x Linux VM you will have these VM’s available in your ‘arc-hack-resources’ Resource Group. These are effectively ‘pretending’ to be your on prem resources:
You can check out my YouTube video on how to manually onboard a Windows server here:
But in short it is comprised of generating a script from the Azure portal, and then running this script on your Windows or Linux VM.
You can find a lot of great information in the Azure Arc Jumpstart site here: https://azurearcjumpstart.io/overview/

Sear for ‘Azure Arc’ in the azure portal:

Select Add:

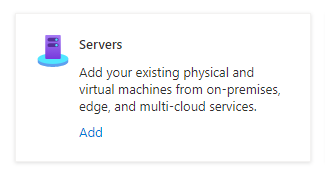
Select Servers -> Add:
Pay close attention here…… on this screen you will see 2 bullet points on how to identify and connect to a server:
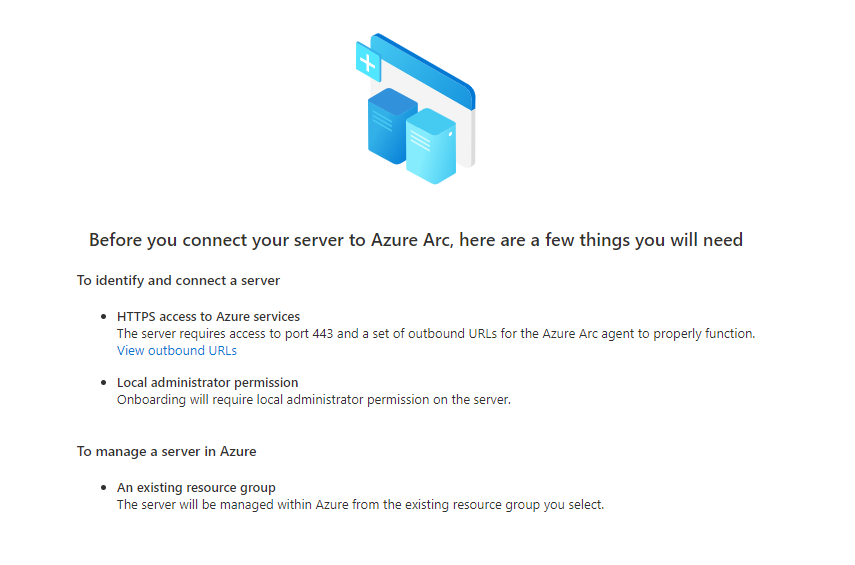
Click Next:

Select your Resource Group that you want to onboard your ‘Arc Enabled’ servers into as well as the Region and OS type, we will select Windows in this case and at this stage we will not apply any tags:
Select Next:

We are then presented with a Powershell script that we can download, its just a simple case of running this on your required Windows server to install the Arc Agent:
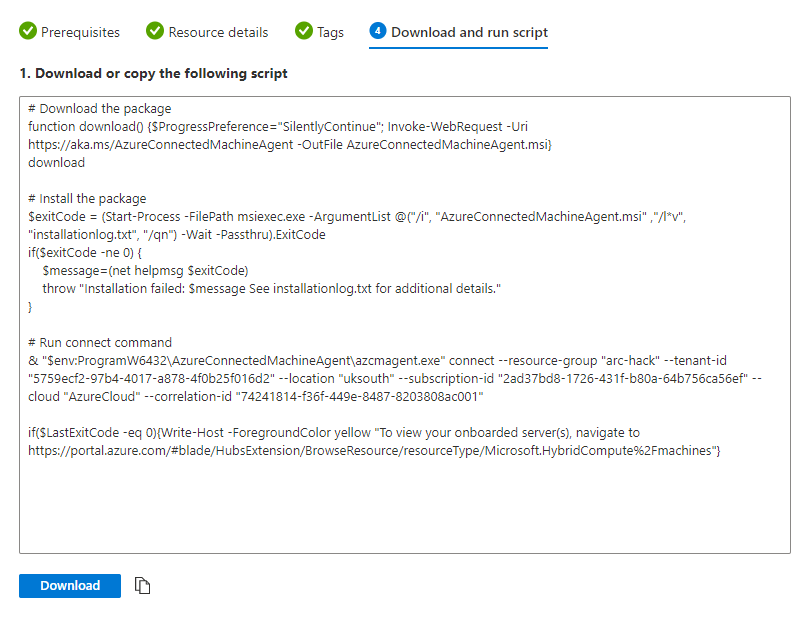
This process can be repeated for your Linux servers, then you can remote ssh onto your Linux server, or RDP onto your Windows server (or use any mechanism you like) to copy and run the script. Once run you will see the servers appear as ‘Arc Enabled’ in the resource group you selected:

At this stage our first task is complete!
Task 2: Azure Policy
Our next task is to look to utilise azure policy to mandate a couple of things:
- We will apply a few tags to our Resource Group, so we want policy to enable these tags to be inherited by our Arc Enabled Servers in Azure.
- We want to ensure the Log Analytics Agent and Dependancy Agents are deployed to our Arc Enabled servers.
So. First thing to do is that we create a couple of Tags at our resource group level:

Now if we go over to Azure Policy we can create 2 Assignments to ensure our Tags are inherited by our Azure Arc Servers:

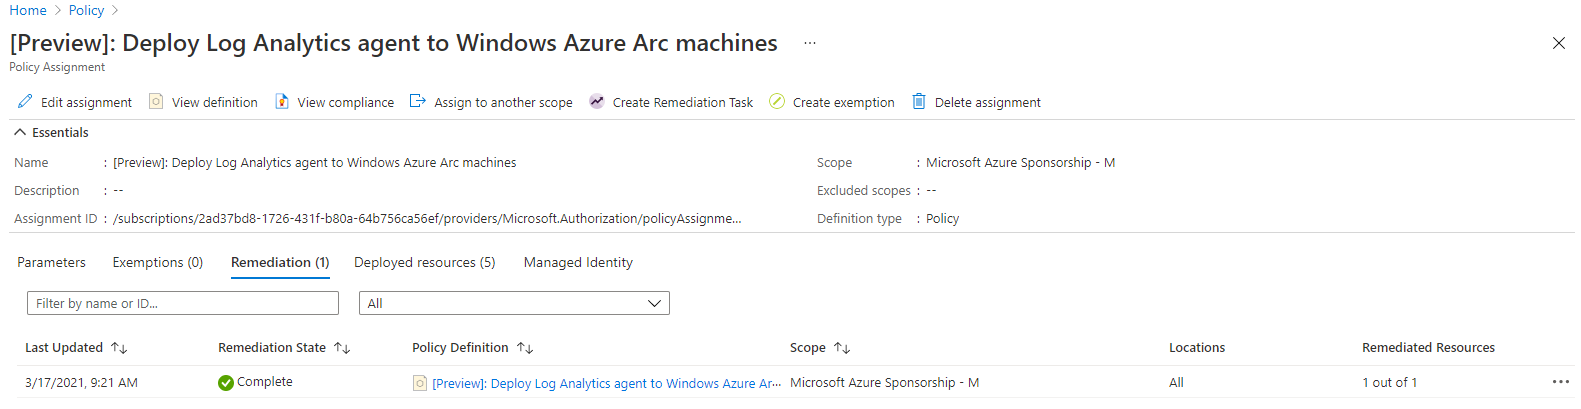
In order for this policy to apply to ‘existing’ objects (i.e. our newly onboarded Arc Servers) we can kick off a remediation task:
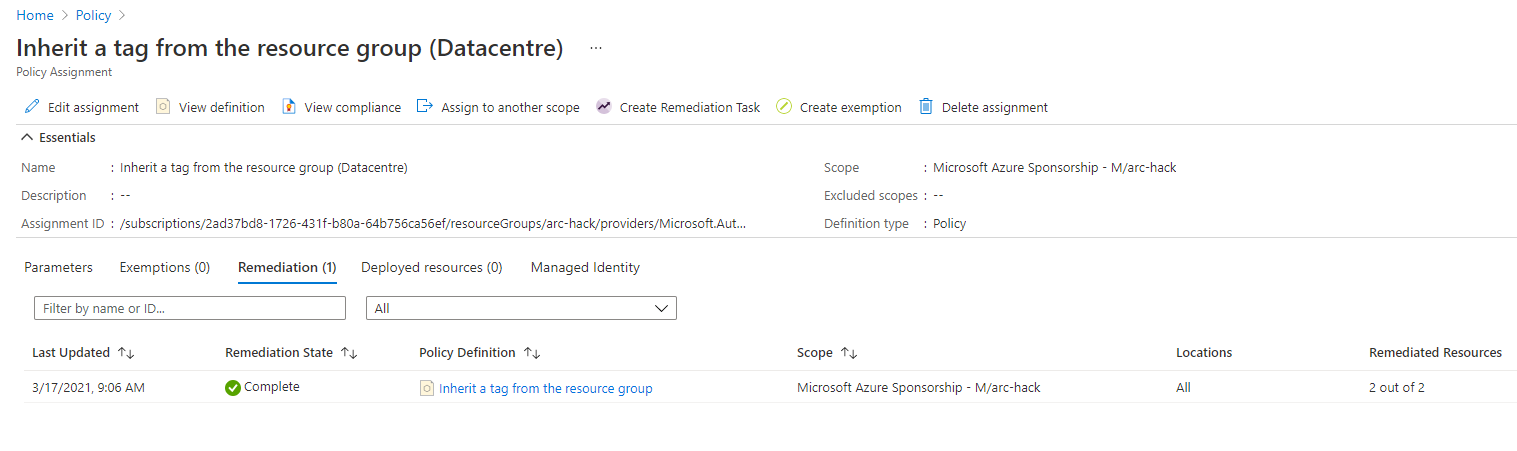
We give it a few moments and we get a nice Green Tick that basically informs us that the policy has been remediated and it has applied to 2 resources (our Linux and Windows Servers!)
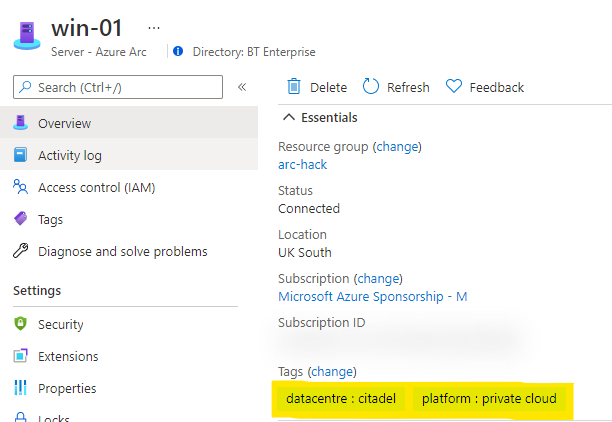
If we check one of our Arc Enabled servers, indeed we can see that our Policy has pushed these tags to the Server obnjects:
So we rinse and repeat this process to enable the Linux and Windows Log Analytics Workspace Agent and the Dependency Agent to be deployed to our Servers, however we first manually created our LA workspace (you can get Policy to deploy this if you don’t have a Log Analytics workspace, however we created one manually):

Back over in Azure Policy, we created 4 assignments of Policy (again you can use an ‘Initiative’ which neatly packages up the relevant policies, however we decided to keep this straight forward for now and assigned the following 4 policies at our ‘Subscription’ scope:

Again, the same principle applies in order to remediate this installation we must create a remediate task. There are a few ways you can do this, either form the portal:
Here we can see the remediation of our ‘Windows’ LA Agent installation has completed and remediated 1 server.
Or…. the other option is to use AZ CLI to script the creation of these tasks.
A typical script to do both the Windows and Linux LA and dependency agents would look like this:
policyAssignmentName=$(az policy assignment list --scope /subscriptions/<SUBSCRIPTION ID> --query "[?displayName == '[Preview]: Deploy Log Analytics agent to Windows Azure Arc machines'].name" --output tsv)

az policy remediation create --name logwin --policy-assignment $policyAssignmentName --definition-reference-id LogAnalyticsExtension_Windows_HybridVM_Deploy --resource-group arc-hack --resource-type Microsoft.HybridCompute/machines
THis is a ‘Bash’ version where we are saving the ‘Name’ parameter of the Policy Assignment into a variable ‘policyAssignmentName’ we could put a $ before the variable name and run this from a powershell termijnal if needed. Just make sure that you have logged onto the tenant and set the correct subscription context if you have multiple subscriptions using:
az login
az account set -s <Subscription Name>
Yjem you can rinse and repeat for each Policy Assignment and target the appropriate agent using the following:
az policy remediation create --name loglin --policy-assignment $policyAssignmentName --definition-reference-id LogAnalyticsExtension_Linux_HybridVM_Deploy --resource-group arc-hack --resource-type Microsoft.HybridCompute/machines
az policy remediation create --name logwin --policy-assignment $policyAssignmentName --definition-reference-id LogAnalyticsExtension_Windows_HybridVM_Deploy --resource-group arc-hack --resource-type Microsoft.HybridCompute/machines
az policy remediation create --name deplin --policy-assignment 935494dd35724c3d9b712fb2 --definition-reference-id DependencyAgentExtension_Linux_HybridVM_Deploy --resource-group arc-hack --resource-type Microsoft.HybridCompute/machines
az policy remediation create --name depwin --policy-assignment $policyAssignmentName --definition-reference-id DependencyAgentExtension_Windows_HybridVM_Deploy --resource-group arc-hack --resource-type Microsoft.HybridCompute/machines
Either way, via the portal or scripting you should achieve the Policy remediation task and end up with your Servers with the agents installed:

Ignore the other agents not highlighted for now! This are for a later task.
At this stage we can be comfortable that our machines are onboarded onto Arc, and have Policy automatically applying Tags and Agent installation to start collecting logs into our Log Analytics Workspace.
Part of this challenge is to then look at writing some Kusto Query Language (KQL) to find some details about our server firstly via the Azure Resource Graph:
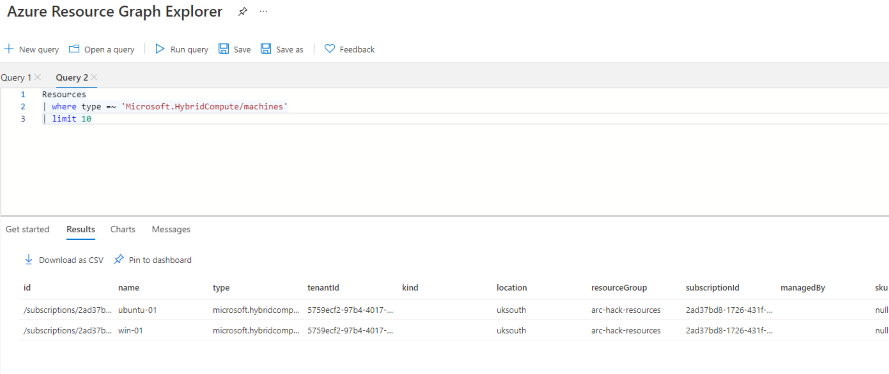
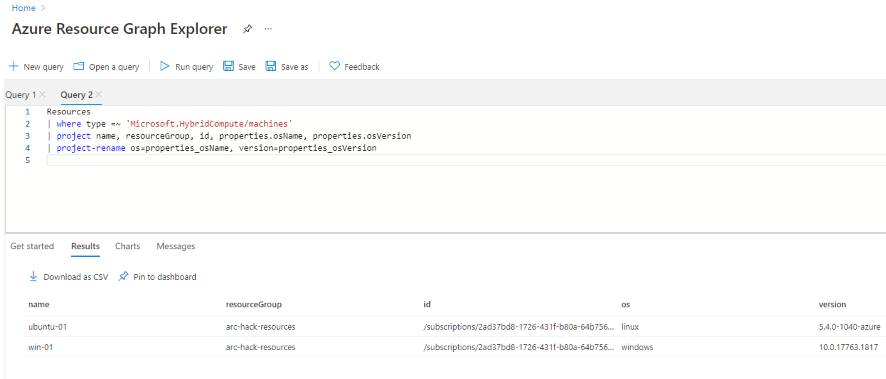
Or we can get a bit more involved with using KQL in our Log Analytics Workspace to query for our Servers:
Resources
| where type =~ 'Microsoft.HybridCompute/machines'
| where isnotempty(tags['platform'])
| where properties.osName == 'linux'
| project name, location, resourceGroup, tags.platform, tags.datacentre, tags.application
| project-rename platform=tags_platform, datacentre=tags_datacentre, application=tags_application
This simple KQL gets our resources and separates out each column by tag as an example:

We can also do some things like trigger a Policy Evaluation using:
az policy state trigger-scan --resource-group arc-hack
At this stage we were completed with task 2. It was at this point that as a group we realised we had some previous Policy that was causing an issue to our Linux agent installation, and we were reaching the end of Day 1.
Long story short is that we had to remove some previously applied policy and we took the opportunity to rerun our Terraform before moving onto Task 3 and day 2!!
Day 2 – Here we go!
After powering on our VM’s and expanding the number of Windows and Linux servers in the Terraform code we followed the guide for Deploying the additions servers to prep for the scale onboarding.
It is worth noting that this task utilises ansible and the output of the terraform is configured in away to automatically create our Ansible Hosts file…… which is pretty cool, we can tak a look at the part of the script here:
resource "local_file" "ansible" {
  for_each = toset(var.create_ansible_hosts ? ["hosts"] : [])

  content = templatefile("${path.root}/hosts.tpl", {
    linux_fqdns = [
      for name in local.linux_vm_names :
      module.linux_vms[name].fqdn
    ],
    windows_fqdns = [
      for name in local.windows_vm_names :
      module.windows_vms[name].fqdn
    ],
    username = var.admin_username,
    password = local.windows_admin_password
  })

  filename        = "${path.root}/hosts"
  file_permission = 644
}
Once run, this part of the Terraform Outputs.tf file creates our Hosts file based on the hosts.tpl template:

Which of course, is pretty neat!
Task 3 – Scale Onboarding
So, with our infrastructure increased to 10 Servers and our Ansible Hosts file generated, we can start the process of onboarding our Servers into Arc at scale using Ansible.
NOTE! This is an odd one that was fed back during the hack, but you will need to goto the Azure Arc area and click on Servers:
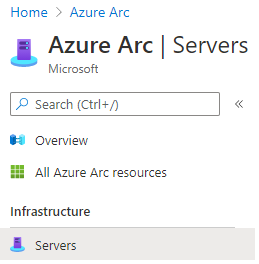
Then click add:

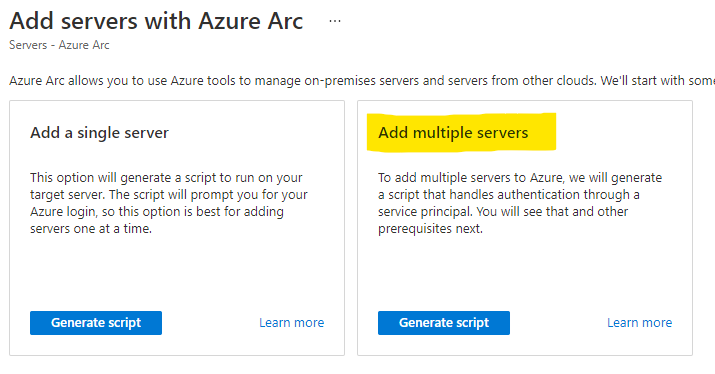
NOTE: Here you will be presented with the choice of generating a script for multiple servers, and not just a single server. (If you use the original method above you will default to a script for single servers), so just be aware!
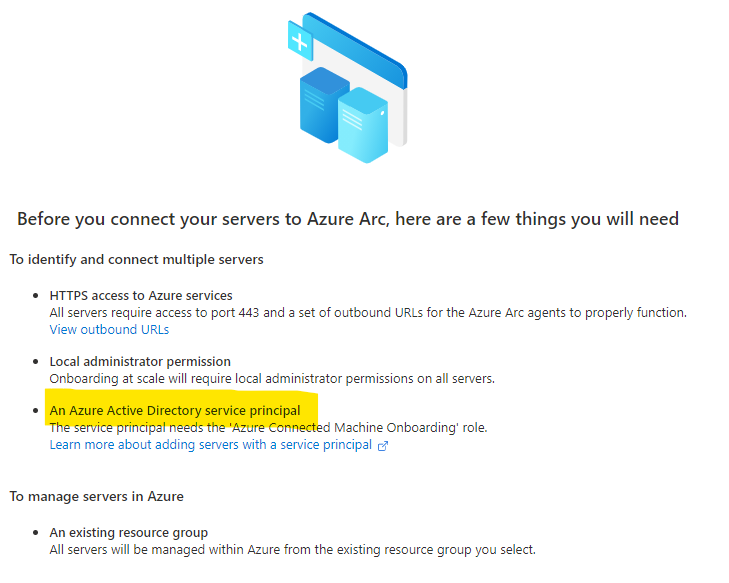
You will see that we now have a 3rd bullet point in the identiy and connect multiple servers checklist:
Follow this guide for creating your service principal:
https://docs.microsoft.com/en-us/azure/azure-arc/servers/onboard-service-principal
or you can use this bash script:
role="Azure Connected Machine Onboarding"
scope=$(az group show --name arc-hack --query id --output tsv)
uniq=$(cd /mnt/d/Projects/arc-onprem-servers; terraform output --raw uniq)
name="http://arc-$uniq"
az ad sp create-for-rbac --name $name --role "$role" --scope $scope
Save the output including the ‘Secret’ as you will need this later to include in your onboarding script!
Next we can select our Resource Group and OS type:
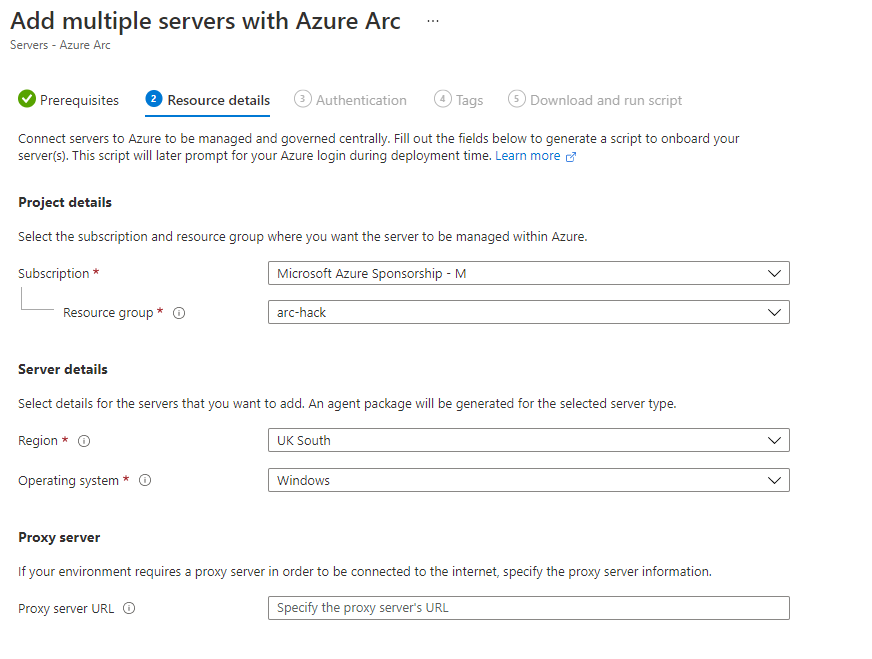
Then select our service principal (this is primarily to avoid the interactive logon with the manual onboard process):

And we will skip the tags section and download our Script:

Repeat this process for the Linux servers and you should be left with two scripts:

ps1 – PowerShell for Windows
sh – Bash Script for Linux
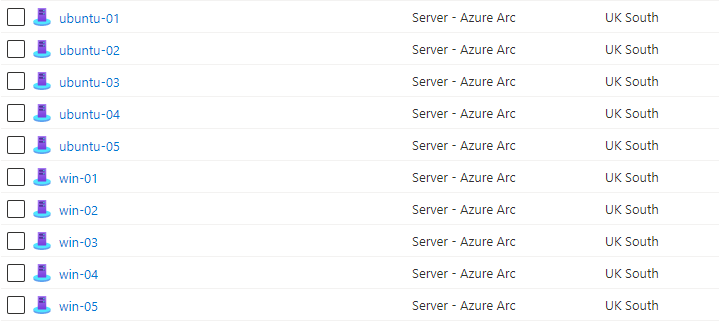
So to just check that we have our 10 VM’s we can look in our resource group (remember this is the infrastructure we are ‘pretending’ is on prem):

So effectively, this Scale onboarding is now all set to use ansible to onboard the remaining 8 Servers into Arc! (remember we manually onboarded the first 2!)
Utilising Ansible and the hosts file generated we can call a simple command to do 2 things for each OS type:
- Copy the script to each Linux Server and to each Windows Server
ansible linux -m copy -a 'src=OnboardingScript.sh dest=/tmp/ owner=root mode=0755' --become
ansible windows -m win_copy -a 'src=OnboardingScript.ps1 dest=C:\\'
- Run the script for each Linux Server and each Windows Server
ansible linux -a '/bin/bash /tmp/OnboardingScript.sh' --become
ansible windows -m win_shell -a 'C:\\OnboardingScript.ps1' --become --become-method runas --become-user System
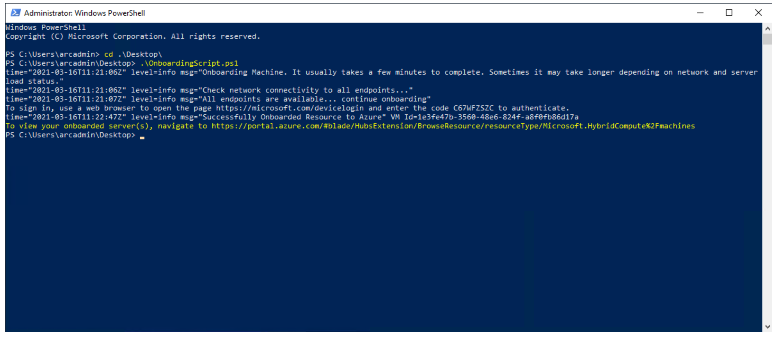
After watching for the successful green output in our terminal window that’s it, we have successfully onboarded our remaining servers at scale!
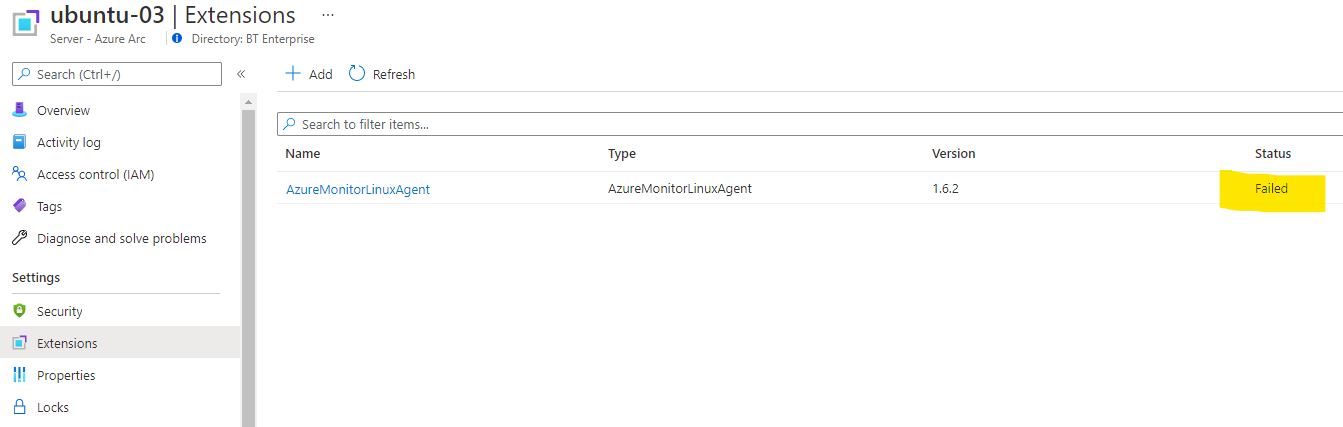
We of course checked that our Policy that we set as part of Task 2 was applying. Patience is a thing here, when using the Azure Policy Portal you may need to remediate any servers that the policy has not picked up for any niggling reasons. To note, if an agent installation fails for any reason, then it is wise to remove it from the Extensions view first before trying a redeploy.


Azure Monitor Agent – Azure Stack HCI
At this point it is worth pointing out that as part of the hack we had two awesome presentations covering the new Azure Monitor Agent, and some great info on Azure Stack HCI and how this can be integrated with Arc.
So a few overview slides on the new Azure Monitor Agent:
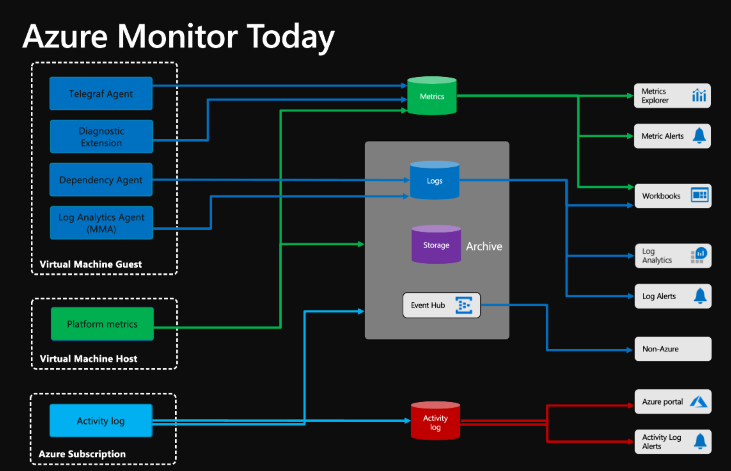

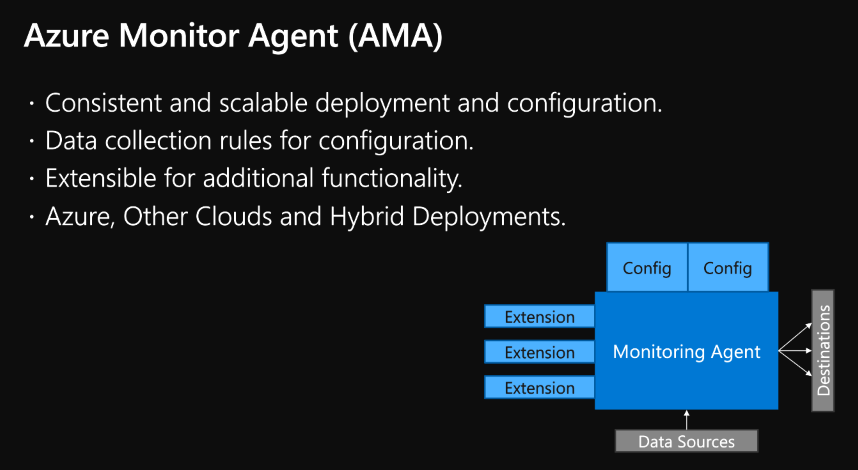
In short the new Azure Monitor Agent (which at time of writing is still in Preview), alleviates some of the pain of multiple agents having to be installed onto Servers. It offer baseline collection and transmission of logs to a Log Analytics Workspace, and also offers an extensible way to include specialised and more focus agent extensions for future growth, but the main collection and transmission agent will become the Azure Monitor Agent.

The concept of Data Collection Rules was introduced in order to understand how we can now target different sets of Log or Performance metrics for a group of servers and transfer this data into separate or multiple LA workspaces if we need to, which gives a superb amount of flexibility to allow different teams to look at different sets of information. Both form a practical and security context, this is a huge benefit of the new Azure Monitor Agent.

ITOps Talk discuss this in more detail here and is well worth a watch:
And just to change focus slightly, we were given some great information on Azure Stack HCO and the range of Hardware products available from Hardware partners and vendors, of which I shall be doing a bit more research!


I will not dwell on Azure Stack HCI for this blog but may well do some more research in time, but did pick up a ton of information, so if anyone wants a chat about this then feel free to reach out!
Ok so after that slight interlude of scene setting we were back to the tasks at hand!
Task 4 – Monitoring
Ok You guessed it, this section is about installing the new Azure Monitor Agent across both Windows and Linux Servers via the Arc Enabled Server object!
We ran through this process quite quickly in the portal to deploy the agent at scale by following this guide:
The long and short of it is that to install the agent, just create a new Data Collection Rule and the agent gets pushed to the Server automatically!!! Here is a nice guide you can follow to create your first DCR:
As an example we created 3 DCR’s for our Hack to show how the relevant logs can be collected and sent to multiple or different Log Analytics workspaces:

And here is how they are represented in the Azure Portal:

You can see here that we chose to keep them in the resource group with our Arc Enabled Server Objects. And if we take a look at one of the Servers, we can see that the Azure Monitor Agent has been automatically pushed:

And that was it, we spent some time digging into the logs that were being collected, and in general we were left upto our own devices to look into the other areas of exploration. We didn’t get through the entire range of tasks but we did start to look at onboarding onto Azure Security Centre, as well as looking at the Azure Monitor Workbooks as part of the Management task.
Also, the Governance and integration tasks talk around deploying a set of compliance standards across your management groups, all of which can now cover your on prem resources once on boarded via Arc.
I would encourage you to check out the Azure Citadel Web site and follow some of the guides as I will definitely be exploring more!
https://www.azurecitadel.com/arc/servers-hack/
Summary
All in all, this was a fantastic 2 day experience, with a huge number of learnings around Hybrid Management with Azure Arc and Monitor, some of which I haven’t been able to document at this stage. I do intend on exploring these areas in further depth in due course, which I’m sure you will want to do as well.
I would like to thank all the Microsoft OCP CSA’s for all their hard work and assistance ever the last two days as for their diligence on creating a superb set of resources and course!
Don’t forget to follow this repo for more updates! https://github.com/azurecitadel/arc-onprem-servers

