

So we hear a lot about Artificial Intelligence and Machine Learning built into devices and applications. In this blog article I will walk through a simple example of how to utilise the CustomVision.ai website to create and train an AI model to recognise objects. This website is part of the Microsoft Cognitive Services features and is a very handy utility to create your very own trained object detection models.
Once you have created and trained your model you can then download and export this model for use in your application and device of choice.
The Problem
Real time video is being utilised more and more to act as the media feed to be processed for object detection. This video source can be utilised for a number of different applications, but in my case and for the purposes of education and learning I have placed a camera to take a feed from my street in order to count the number of cars in the view of my camera at a given point in time.
The problem comes from training your own model with a high success rate of detection based on a number of environmental factors such as lighting conditions, weather as well as angle of the cars in the field of view etc.
There are some prebuilt object detection models available for use within your applications that have been trained to detect tens if not hundreds of object classes which may very well work for your application. In particular a model I have utilised is the Yolo (You only look once) model. You can read more about this model and how it works, and that there are a few variants of the model depending on the compute recourses you have available to process the video feed.
Within this article I am going to try and simplify the process of defining your own Custom AI model from scratch using nothing more than a base set of images.
The Training Process
So for this process I am going to utilise the CustomVision.ai website which is provided by Microsoft as a platform to train an object detection model and label/tag images with the objects that you are specifically looking to train to detect.
First, we are going to logon to the CustomVision.ai website and login with an AzureAD Tenant Account. In my case I am utilising an MSDN (Visual Studio) account that gives me a free amount of Azure credit to consume each month.

You will see that I have already created a new project called ‘Jonnychipz-Module’, you can create your own.
Then if we jump into this project , we can see that I have uploaded a small number of images to use to train this model.

Please note that for best results you will want to use the camera and the view that will be the source of the feed for your application if possible. That way you can train the model based on the actual feed and images that the application is likely to experience, thus increasing the probability of the model detecting successfully the objects you are training it to recognise.
In order to get a very basic model trained you will need a minimum of 15 images per tag you are going to train for. You can see that I have used 3 different tags in my model ‘car’, ‘van’. This is all dependent on what you require from your application. For the purposes of this exercise I am going to keep this simple and detect ‘car’ or ‘van’.
Capturing your source images
So, there are a few ways to do this depending on your requirements. I am using an RTSP stream from my webcam, which you could manually take a screen shot of, but you may agree this will be time consuming and you would have to be waiting for very specific scenes to occur to gain a large array and variation of images in order to train your model.
I have utilised this simple script that utilised FFMPEG application to take a snip of my 2 webcams every 15 seconds and store them in a folder locally.
i=1
while true
do
	echo processing images: $i
	ffmpeg -loglevel fatal -rtsp_transport tcp -i "rtsp://rtsp:12345678@192.168.1.162:554/av_stream/ch0" -r 1 -vframes 1 "street$i.jpg"
	ffmpeg -loglevel fatal -rtsp_transport tcp -i "rtsp://rtsp:12345678@192.168.1.143:554/av_stream/ch0" -r 1 -vframes 1 "studio$i.jpg"
	((i+=1))
	sleep 15
done
After running for a few hours I have captured a series of images that are ripe for use to train my model as follows:
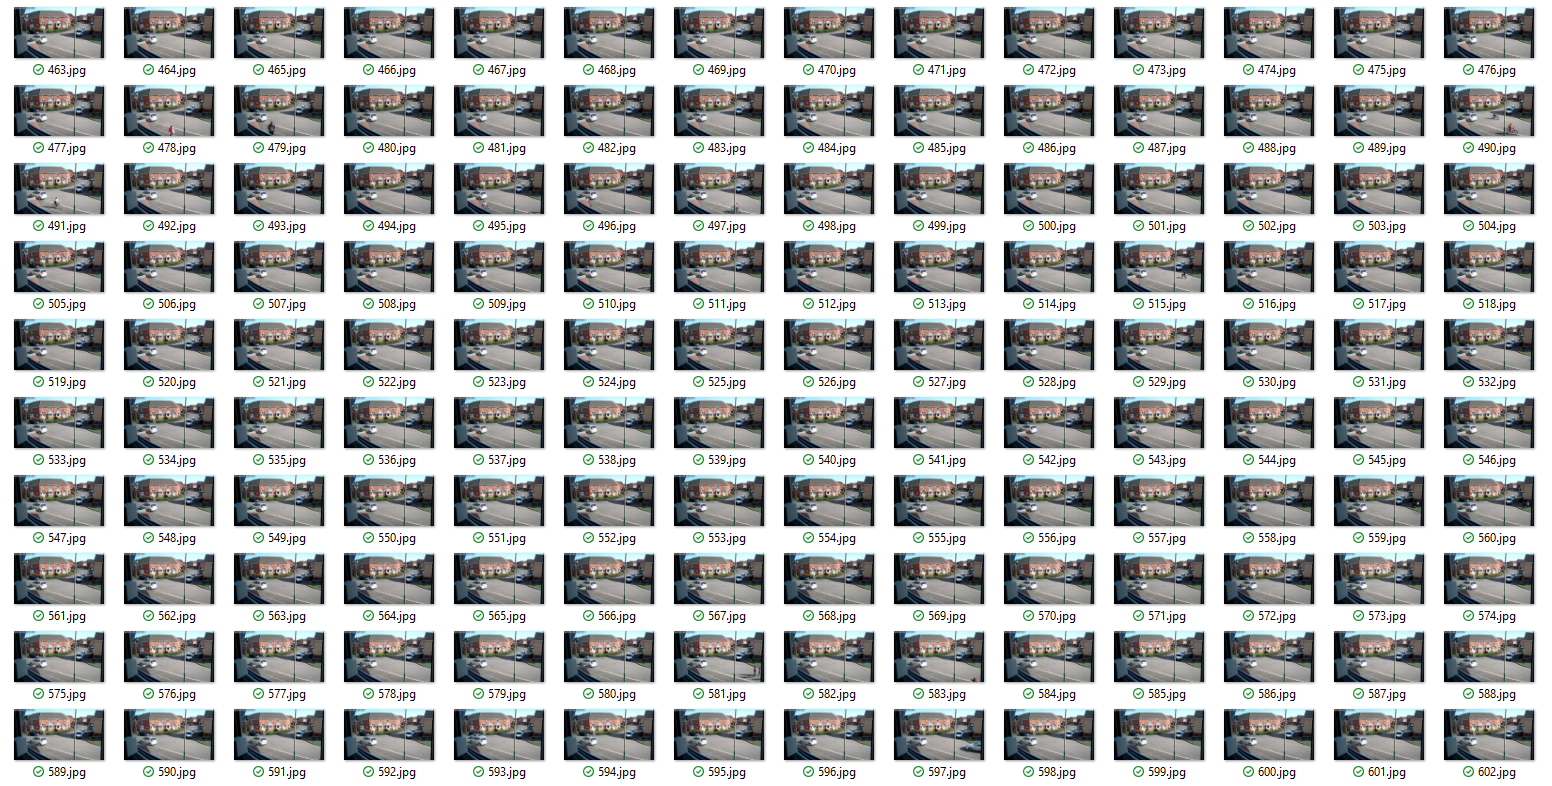
So now we have a selection of images to start with, lets upload a few of these to our CustomVision.ai model.
Uploading Training Images
Click on Add images
Ive selected a large selection of images and click on Upload FIles:
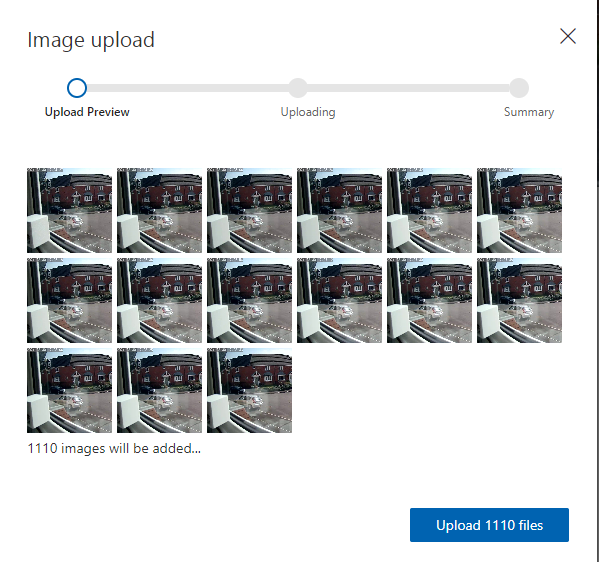

Just wait for your images to upload and we can start to tag!
Tag your images
Once you have a number of training images uploaded to your project, you can start to identify the objects you wish your model to train on. If you select the ‘Untagged’ option under the ‘Tags’ Heading, you will be presented with all of your images that require a tag!

If we select an image and hover over a specific item in your source image you will see a bounding box appear that you can size correctly over the object of interest:

We select this object and add our tag:


Once we have a minimum of 15 tags per category, we can train our model. However in reality you really want to look to supply and tag at least 100 images to gain higher accuracy.

Train your model
Lets click on the Green Train button:
We can choose between ‘Quick Training’ or ‘Advanced Training’
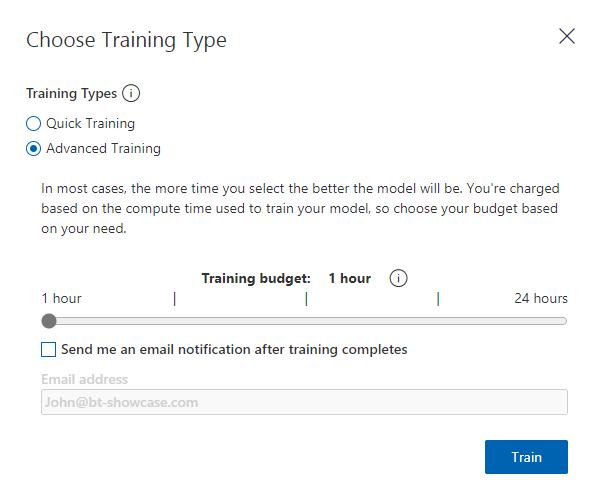
Advanced training is meant for very granular training or challenging image sets that would need further detailed training. In our case I will use the ‘Quick’ method:

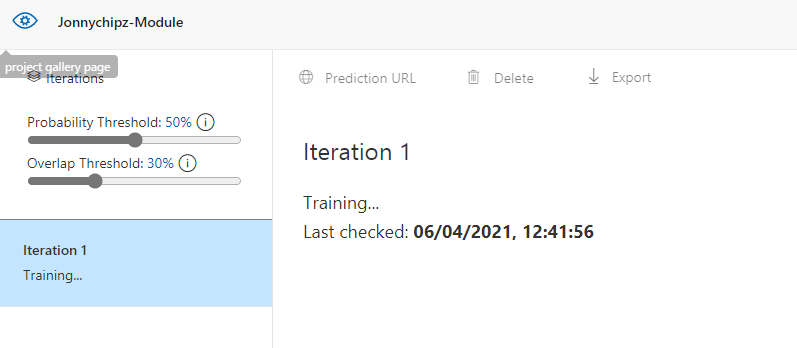
Once we click ‘Train’ we will be presented by a status page:
After a few minutes of training we get back an estimated precision (how likely is a prediction likely to be correct), recall (out of the provided tags, what percentage does your model correctly find) and mean average precision, (overall performance across all tags):

Now we can keep loading and tagging new images and retraining this model based on its performance. As it happens, these aren’t too bad numbers based on the number of tags provided. If you have a very niche case to detect then this may be enough for your model. The proof of the test is in the application of course!
So at this stage we have completed our model training, well at least the first iteration! As you add and tag more images and retrain, you can use this Performance tab to keep a track on the history of your model:

Testing our Model
Once we have done at least one iteration of training, we can use the ‘Predictions’ tab in order to perform a quick test using some sample images:

If we select:

We can either select an image URL, or upload an image from our local PC:
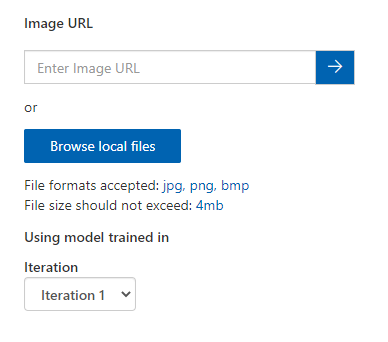
In this instance I am going to upload an image:
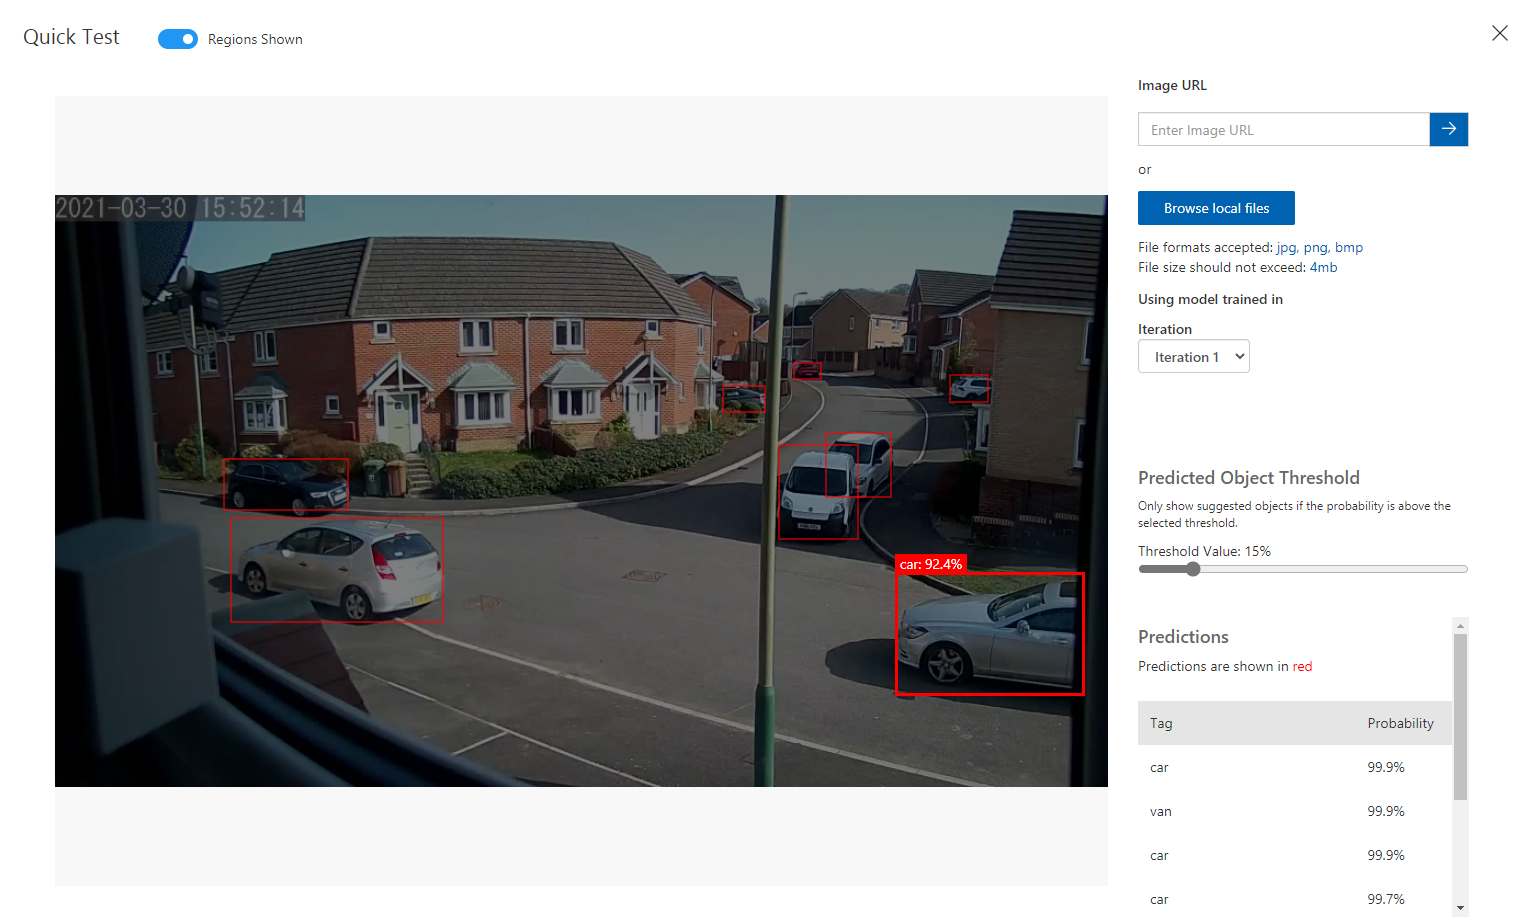
So , we can get quick feedback based on some sample or control images which is great to gain that initial comfort that our model is working as we would expect.
However great your initial results may appear to be, you should always be mindful that you will get ‘edge’ cases, resulting in either false detections, or missing detections. This is quite usual in training your first model and basically means that you need to feed in more of the edge case imagery and tag/train the model appropriately.
This can of course be done over time and your model can be retrained as many times as you need.
What next? – Exporting your trained model
So you have reached the point where you have a trained Custom Vision AI Model that you would like to utilise in your application. Exporting our model is as simple as clicking on the Export Button within our ‘Performance’ tab and selecting the output you require based on your application.

If I choose an ONNYX model for use with Windows ML, I can select this. I am also given links to sample applicaitons to understand how I can utilise this model in my application:


Conclusion
I hope you have found this run through of creating your own Custom Vision AI model interesting. Each output type should give you some inspiration on how you can utilise the Model in a specific application.
Personally I have been playing with this model on my own interpretation of the Nvidia Jetson Nano hardware accelerated edge device for RTSP media stream detection in near real time and presentation back to an IoT Hub and Time Series Analytics service and also onto a Power BI dashboard.
You can watch a little more about this in my recent Jonnychipz Weekly video below!

Jonnychipz Weekly # 14 – AI Powered Object Detection!
Week 14 of my Jonnychipz weekly VLOG, covering the Last Week of Azure News and Updates, Welsh Azure User Group News and some great Community Callouts. Live at 12.30pm GMT 02.04.21. on my YouTube channel (Click the link below!) (Ignore the wrong date on the video! oops!) This week I give an update on the…
