Logic Apps can of course be created directly in the Azure Portal, but I thought I would get my VS Code environment set up with the necessary plugins and configuration after seeing some cool demo’s at the recent Welsh Azure User Group.
I am keen to get as much configuration capability worked out and understood from my VS Code environment as possible and Logic Apps is no different.
Arguably you can get started with Azure Logic Apps faster with VS Code!
For this blog I am going to look to create a Logic App to understand the basic concepts, so hope you get use out of it!
Before you start, make sure that you have these items:
- If you don’t have an Azure account and subscription, sign up for a free Azure account.
- Basic knowledge about logic app workflow definitions and their structure as described with JSON If you’re new to Logic Apps, try this quickstart, which creates your first logic apps in the Azure portal and focuses more on the basic concepts.
- Access to the web for signing in to Azure and your Azure subscription
- Download and install these tools, if you don’t have them already:
- Visual Studio Code version 1.25.1 or later, which is free
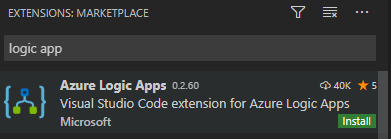
- Visual Studio Code extension for Azure Logic Apps You can download and install this extension from the Visual Studio Marketplace or directly from inside Visual Studio Code. Make sure that you reload Visual Studio Code after installing.
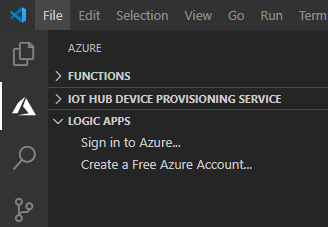
To ensure the extension installed correctly you can click the Azure icon on the left
For more information, see Extension Marketplace. To contribute to this extension’s open-source version, visit the Azure Logic Apps extension for Visual Studio Code on GitHub.
Access Azure from Visual Studio Code
- Open Visual Studio Code. On the Visual Studio Code toolbar, select the Azure icon and under Logic Apps, click on Sign in to Azure…

Once signed in you should see this:
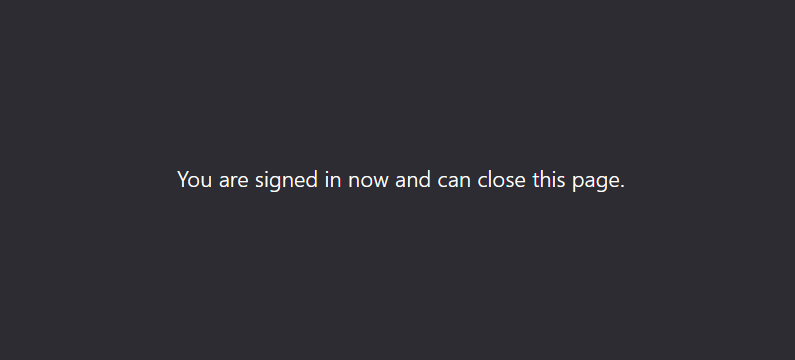
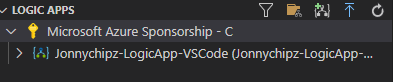
And all your subscriptions should be visible in your VS Code window under Logic Apps.
Create the new Logic App
- In Visual Studio code, under Logic Apps, open your subscription’s shortcut menu, and select Create Logic App.

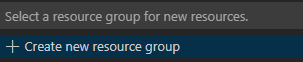
2. Select Create new Resource group
3. Name the resource group:

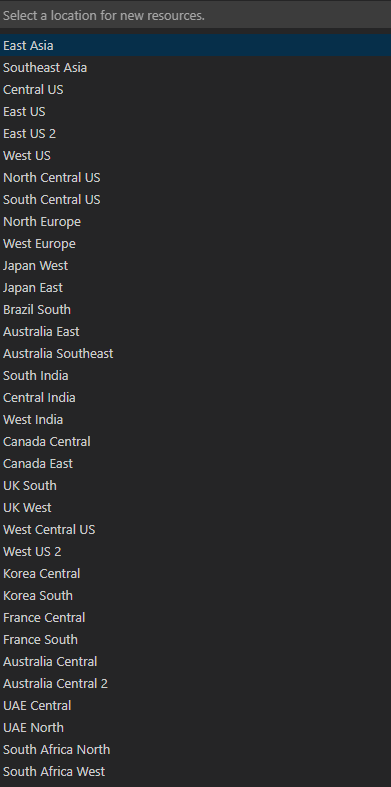
4. Select an Azure Region to save the Logic Apps metadata:
5. Provide a Name for the Logic App and Press Enter:
In the Azure window, under your Azure subscription, your new and blank logic app appears. Visual Studio Code also opens a JSON (.logicapp.json) file, which includes a skeleton workflow definition for your logic app. Now you can start manually authoring your logic app’s workflow definition in this JSON file. For technical reference about the structure and syntax for a workflow definition, see the Workflow Definition Language schema for Azure Logic Apps.

For example, here is a sample logic app workflow definition, which starts with an RSS trigger and an Office 365 Outlook action. Usually, JSON elements appear alphabetically in each section. However, this sample shows these elements roughly in the order that the logic app’s steps appear in the designer.
{
    "$schema": "https://schema.management.azure.com/providers/Microsoft.Logic/schemas/2016-06-01/workflowdefinition.json#",
    "contentVersion": "1.0.0.0",
    "parameters": {
       "$connections": {
          "defaultValue": {},
          "type": "Object"
       }
    },
    "triggers": {
       "When_a_feed_item_is_published": {
          "recurrence": {
             "frequency": "Minute",
             "interval": 1
          },
          "splitOn": "@triggerBody()?['value']",
          "type": "ApiConnection",
          "inputs": {
             "host": {
                "connection": {
                   "name": "@parameters('$connections')['rss']['connectionId']"
                }
             },
             "method": "get",
             "path": "/OnNewFeed",
             "queries": {
                "feedUrl": "http://feeds.reuters.com/reuters/topNews"
             }
          }
       }
    },
    "actions": {
       "Send_an_email_(V2)": {
          "runAfter": {},
          "type": "ApiConnection",
          "inputs": {
             "body": {
                "Body": "<p>Title: @{triggerBody()?['title']}<br>\n<br>\nDate published: @{triggerBody()?['updatedOn']}<br>\n<br>\nLink: @{triggerBody()?['primaryLink']}</p>",
                "Subject": "RSS item: @{triggerBody()?['title']}",
                "To": "john@bt-showcase.com"
             },
             "host": {
                "connection": {
                   "name": "@parameters('$connections')['office365']['connectionId']"
                }
             },
             "method": "post",
             "path": "/v2/Mail"
          }
       }
    },
    "outputs": {}
 }
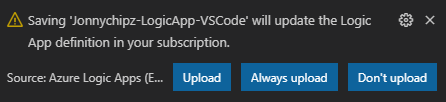
6. When you’re done, save your logic app’s workflow definition. (File menu > Save, or press Ctrl+S)
When you’re prompted to upload your logic app to your Azure subscription, select Upload.
This step publishes your logic app to the Azure portal, which and makes your logic live and running in Azure.
View logic app in designer
In Visual Studio Code, you can open your logic app in read-only design view. Although you can’t edit your logic app in the designer, you can visually check your logic app’s workflow by using the designer view.
In the Azure window, under Logic Apps, open your logic app’s shortcut menu, and select Open in Designer.
The read-only designer opens in a separate window and shows your logic app’s workflow, for example:
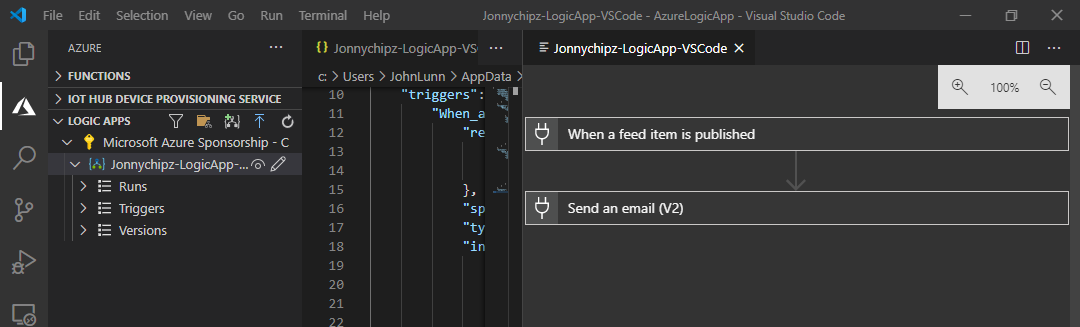
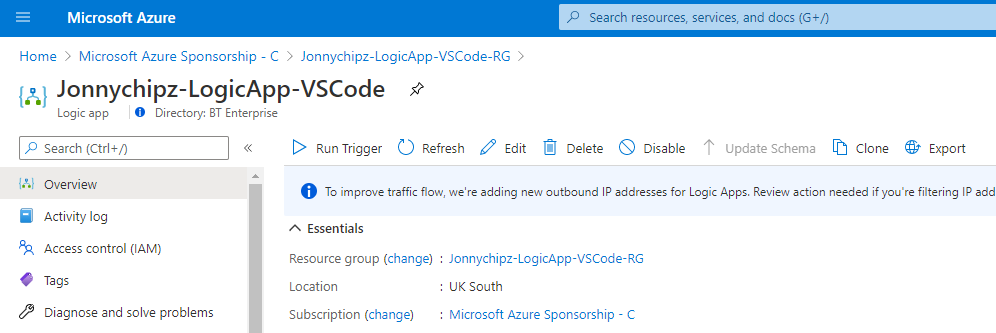
View in Azure portal
To review your logic app in Azure portal, follow these steps:
- Sign in to the Azure portal by using the same Azure account and subscription that’s associated with your logic app.
- In the Azure portal’s search box, enter your logic apps’ name. From the results list, select your logic app.
Disable or enable logic app
In Visual Studio Code, if you edit a published logic app and save your changes, you overwrite your already deployed app. To avoid breaking your logic app in production and minimize disruption, deactivate your logic app first. You can then reactive your logic app after you’ve confirmed that your logic app still works.
- If you haven’t signed in to your Azure account and subscription yet from inside Visual Studio Code, follow the previous steps to sign in now.
- In the Azure window, under Logic Apps, expand your Azure subscription so that you can view all the logic apps in that subscription.
- To disable the logic app that you want, open the logic app’s menu, and select Disable.
- When you’re ready to reactivate your logic app, open the logic app’s menu, and select Enable.
These are the basic principles of creating and editing a Logic App via VS Code.
100DaysOfCloud Overview
My Main ReadMe Page is all set up with a bit about me!

The guys at 100DaysofCloud have set up the GitHub repo to be cloned and also have a great repo containing ideas and areas to collaborate on: https://github.com/100DaysOfCloud/100DaysOfCloudIdeas
My Github Journey tracker can be found here: https://github.com/jonnychipz/100DaysOfCloud
Please Watch/Star my repo and feel free to comment of contribute to anything I push! I really look forward to hearing from anyone who is going to jump on the journey around the same time as me! Lets see where I get to in 100 days!
I would encourage others to jump on this journey, I’m not sure that I will be able to commit every day for 100 days, but as long as I can complete 100 days that will be great!