

In this blog article, I aim to guide you through the components needed in order to successfully deploy Azure Infrastructure using Terraform via an Azure DevOps Pipeline.
The idea here is to help understand how you may be able to automate the deployment and updating of your cloud infrastructure hosted in Azure.
Follow along with this blog on my YouTube Channel www.youtube.com/CloudTalkWithJonnychipz
Before we jump in to the examples below, we should probably step back and try to understand the ‘why’ surrounding the above.
So clearly there are a number of technologies that we are pulling together here, each with their own pro’s and con’s, I guess the purpose of this article is to take our basic understandings of each of the areas and look to make a repeatable, secure and reliable deployment approach. If we break each of the elements down and ask ourselves the ‘why’, I don’t propose to go into too much detail on each as there are already superb articles and videos that are out there that drill down into the details, but if we take the base assumptions as follows:
Why ‘GitHub’?
GitHub is a Source Code control platform hosted in the public domain. I have created a ‘public’ facing repository (repo) in order that you can see and access my code for this article.
This doesn’t necessarily have to be GitHub, as Azure DevOps Repo’s give similar ‘Git’ functionality. I am not going to drill into the ‘Why’ use Git, again there are several articles that will explain this far better then I! But I think we should all be able to agree that a source code repo for control, audit and version control is a good thing!
Why ‘Azure’?
Azure is a Cloud platform that enables business to identify opportunities to grow and scale their environment whilst managing cost and capacity, the benefits of Cloud Computing are huge and like I say, I won’t be delving into the detail…….. if we can take the assumption that Azure is a good place to be!
Why ‘Terraform’?
The basic idea behind Terraform (again not drilling down into too much detail), is that it enables you as an ITPro / Developer, to use Infrastructure as Code (IaC) tooling in one language to deploy to multiple Cloud Platforms with ease, these are known as ‘Providers’ in Terraform and Terraform has hundreds of providers, with Azure being just one. Check them out here.
The ability to deploy, destroy, redeploy is made very simple with the use of a ‘tfstate’ file that we will discuss later in this article. This enables Terraform to know the ‘state’ since the last deployment and only implement the changes implied by a code update. There is actually a feature in Terraform known as ‘PLAN’ that actually just reports the changes it will make before you ‘APPLY’ them.
Other benefits such as enabling Source control and version control are inherent through the ability to simply define your infrastructure as code!
Why ‘Azure DevOps’?
Ok so, Azure DevOps is a set of ‘technologies’ that enable you to improve your business productivity, reliability, scale and robustness if used correctly. DevOps is something I have been reading and studying for a while now, and as you can see in my other blog posts, DevOps is a very tricky term to get right and understood! So, in my view, the practice of ‘DevOps’ is very much about 3 fundamental principals: People, Process and Technology. Azure DevOps very much sits in the ‘Technology’ part of the triangel.
Azure DevOps gives us multiple ‘tooling’:

And for the purposes of this article, we will be utilising ‘Pipelines’
Together this tooling offers a set of features in order to automate the deployment of our infrastructure with checks based on a ‘Trigger’, thus giving us a great way to ensure that our code is Tested and deployed, within a workflow if necessary, and this provides an auditable, repeatable and reliable mechanism to avoid any human error etc.
OK so what are we going to do?
If we bring the 4 items together in this article (GitHub, Azure, Terraform, and Azure DevOps) we have a series of technologies that enable us to start to design and automate infrastructure deployment and management into Azure. As an ITPro, I am sure everyone can agree that the time for design and deployment and the automation of this process is something positive and extremely beneficial to any company.
So……
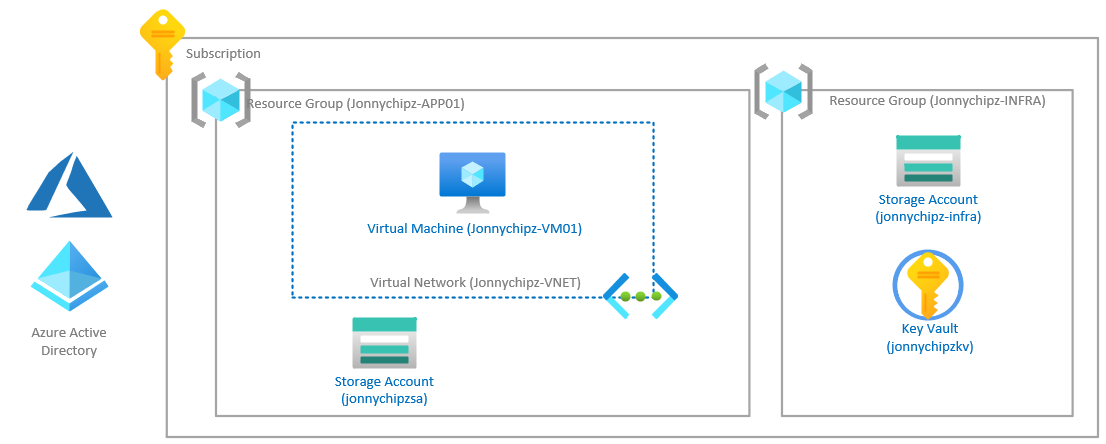
For the purposes of this article we are going to look to deploy the following basic landing zone into our Azure Subscription.
Components Required
- 1 – GitHub Repo
- 2 – Azure Subscription to contain the infrastructure we are going to deploy
- 3.1 – Terraform Code to deploy Azure Infrastructure from local machine (JONNYCHIPS-APP01):
- Resource Group
- Virtual Network
- Virtual Machine
- Storage Account
- 3.2 – Terraform Code to deploy Azure Infrastructure with a shared state file.
- The items in Resource Group Jonnychipz-INFRA will need to be created outside of Terraform, within this article I will show the AZCLI commands to create:
- Resource Group
- Storage Account
- Key Vault (With access key for Storage Account)
- 4 – Azure DevOps Organisation
- 5 – Azure DevOps Pipeline
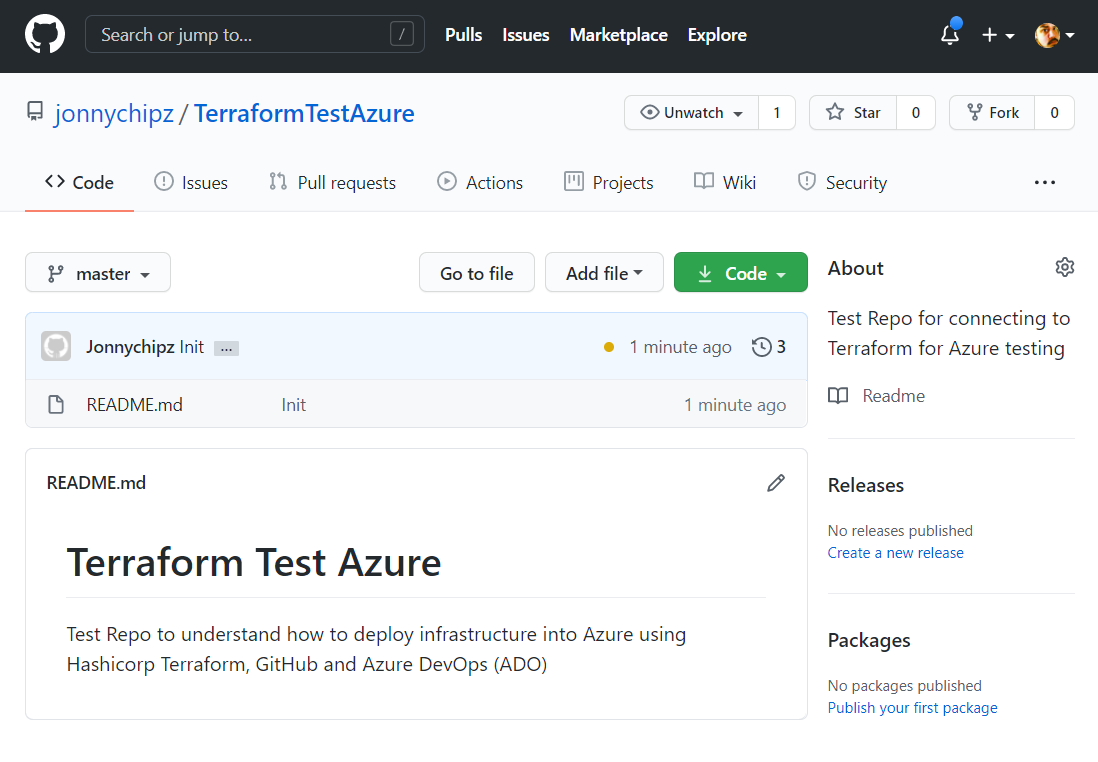
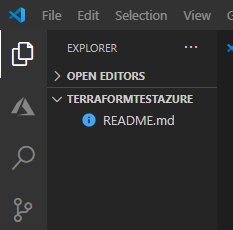
1.1 – Create Your GitHub Repo and clone to local machine
I have logged into github.com and created a simple repo with a README.md file, the repo is available at https://github.com/jonnychipz/TerraformTestAzure
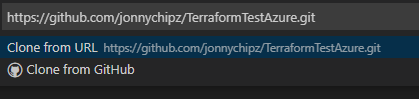
1.2 Clone Repo to local machine for use within VSCode
In order to interact and modify your Terraform code on your local machine you can clone your newly created GitHub Repo and use your local machine to edit files and commit back to the repo in GitHub.
- Open VSCode
- Press CTRL + Shift + p
- Enter the GitHub Repo URL: (note if you don’t have the GitHub VSCode extension, install this from the extensions tab in VSCode)
- Select local repository location:
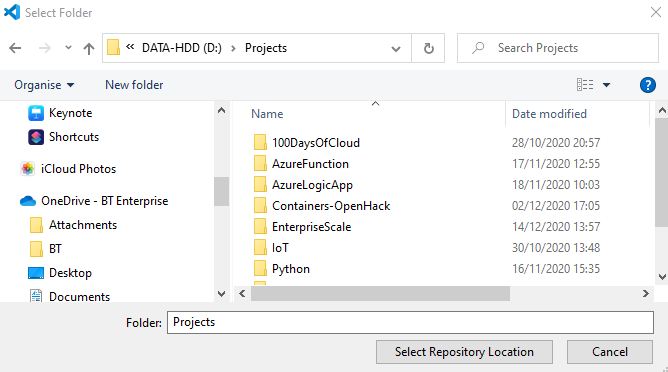
- Open Cloned Repo on your local machine in VSCode

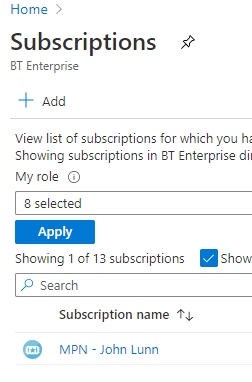
2 – Azure Subscription
Make sure you have access to an Azure Subscription that can be utilised to deploy infrastructure into. I am using my MSDN subscription which gives me an amount of credits that get renewed on a Monthly basis. If you don’t have a subscription, you can sign up for a free trial here – AZURE FREE TRIAL
This free trial gives you the following:

However, as I mentioned, I am fortunate with my job to have access to an MSDN account that gives me a certain spend level each month, so I will be using this subscription for this article.
3.1 – Terraform Code to deploy Azure Infrastructure from local machine
Next Lets Create our Terraform code. We are going to create and test this on our local machine before modifying the code to deploy to Azure DevOps Pipelines. The following steps assume you have already installed the latest Terraform Module on your local machine, if you haven’t then follow this guide. Also, it assumes you have installed the AZCLI.
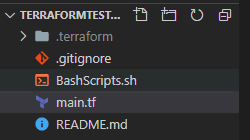
Within VSCode Terminal browse to your newly cloned Repo folder on your local machine and type code . (don’t forget the fullstop!)

This opens up our working folder in VS Code.
Next type ‘az login‘

This will take you off to an OAUTH web page for you to enter your Azure Credentials to authenticate your terminal session. Remember at this stage we are going to authenticate our local machine so we can test our Terraform code before we look to deploy it using Azure DevOps Pipelines.
You will be presented with your subscription in JSON format, if you have multiple subscriptions then you will need to set the context to the subscription you would like to use. We can use either the Subscription ID, or the Subscription name.
To set Context from my subscription I type: ‘az account set —subscription “MPN – John Lunn”‘
Now lets get on with our Terraform Code, I will keep this deployment simple by storing all my configuration in a single ‘main.tf’ file, so right click your open folder and create a new file called ‘main.tf‘

The Terraform code I will be starting with to create my infrastructure is as follows:
main.tf
terraform {
  required_providers {
    azurerm = {
      # Specify what version of the provider we are going to utilise
      source = "hashicorp/azurerm"
      version = ">= 2.4.1"
    }
  }
}
provider "azurerm" {
  features {
      key_vault {
      purge_soft_delete_on_destroy = true
    }
  }
}
data "azurerm_client_config" "current" {}
# Create our Resource Group - Jonnychipz-RG
resource "azurerm_resource_group" "rg" {
  name     = "jonnychipz-app01"
  location = "UK South"
}
# Create our Virtual Network - Jonnychipz-VNET
resource "azurerm_virtual_network" "vnet" {
  name                = "jonnychipzvnet"
  address_space       = ["10.0.0.0/16"]
  location            = azurerm_resource_group.rg.location
  resource_group_name = azurerm_resource_group.rg.name
}
# Create our Subnet to hold our VM - Virtual Machines
resource "azurerm_subnet" "sn" {
  name                 = "VM"
  resource_group_name  = azurerm_resource_group.rg.name
  virtual_network_name = azurerm_virtual_network.vnet.name
  address_prefixes       = ["10.0.1.0/24"]
}
# Create our Azure Storage Account - jonnychipzsa
resource "azurerm_storage_account" "jonnychipzsa" {
  name                     = "jonnychipzsa"
  resource_group_name      = azurerm_resource_group.rg.name
  location                 = azurerm_resource_group.rg.location
  account_tier             = "Standard"
  account_replication_type = "LRS"
  tags = {
    environment = "jonnychipzrox"
  }
}
# Create our vNIC for our VM and assign it to our Virtual Machines Subnet
resource "azurerm_network_interface" "vmnic" {
  name                = "jonnychipzvm01nic"
  location            = azurerm_resource_group.rg.location
  resource_group_name = azurerm_resource_group.rg.name

  ip_configuration {
    name                          = "internal"
    subnet_id                     = azurerm_subnet.sn.id
    private_ip_address_allocation = "Dynamic"
  }
}
# Create our Virtual Machine - Jonnychipz-VM01
resource "azurerm_virtual_machine" "jonnychipzvm01" {
  name                  = "jonnychipzvm01"
  location              = azurerm_resource_group.rg.location
  resource_group_name   = azurerm_resource_group.rg.name
  network_interface_ids = [azurerm_network_interface.vmnic.id]
  vm_size               = "Standard_B2s"
  storage_image_reference {
    publisher = "MicrosoftWindowsServer"
    offer     = "WindowsServer"
    sku       = "2016-Datacenter-Server-Core-smalldisk"
    version   = "latest"
  }
  storage_os_disk {
    name              = "jonnychipzvm01os"
    caching           = "ReadWrite"
    create_option     = "FromImage"
    managed_disk_type = "Standard_LRS"
  }
  os_profile {
    computer_name      = "jonnychipzvm01"
    admin_username     = "jonnychipz"
    admin_password     = "Password123$"
  }
  os_profile_windows_config {
  }
}
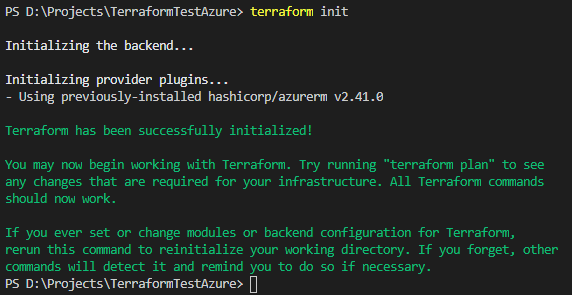
We will first run a ‘Terraform INIT‘
Now we will check to see what Terraform is going to do in our Azure Environment by running a ‘Terraform PLAN‘ This output is longer than this screen shot, but this is the start:
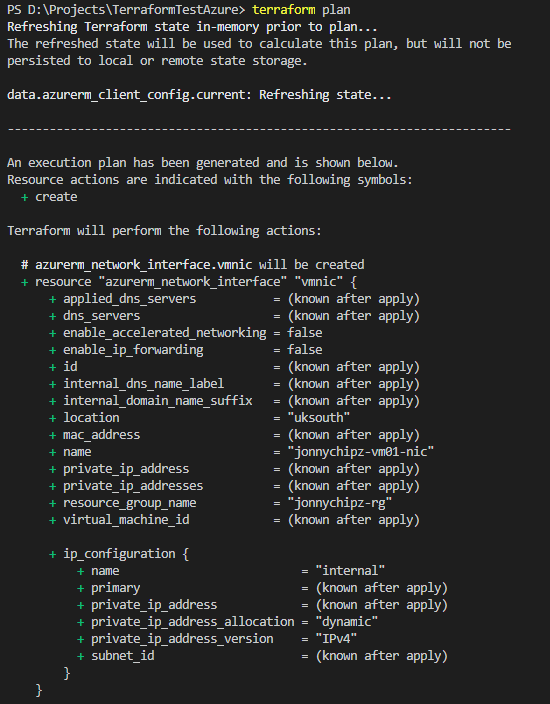
And this is the end of the output:

You can see that the ‘PLAN’ command outputs to screen what we are about to do in our environment, this being to add 6 items in my case.
So lets see if we can deploy successfully from our local machine. To do this we run the ‘Terraform APPLY‘ command. This will take a couple of minutes to run through, but at the end you should find you have all the resources in the resource group as we expected!
So now we know that our Terraform code is working that is perfect. However, when we ran the Terraform Apply, a few new files were created in our local folder:
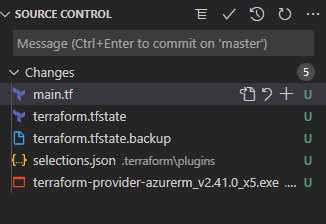
I would like to pay close attention to the ‘terraform.tfstate’ file. This file is where all the current configuration, that has been deployed into your subscription. This is the file that is used to compare any differences in your Terraform code and your main.tf file….. so the point here is, that currently, I would have to use my local PC all the time in order to deploy changes to our environment. This is fine if I have a small environment that is personal to me, or just for testing, but if I want to collaborate, or in fact use a service like Azure DevOps Pipelines to run my commands, I really need to store this state file in a location that is available to all, as well as securely store the credentials and update my Terraform code appropriately!
That’s what we are going to look at in the next section. So we can use the ‘Terraform DESTROY‘ command to remove all the infrastructure from our subscription, so we can look at moving our state file to a centralised area.
3.2 – Terraform Code to deploy Azure Infrastructure with a shared state file.
The next step in this process is to separate the Terraform State file off into a centralised location such as an Azure Storage account.
This brings with it a few points we should be aware off.
- The storage account needs to be created before Terraform code is applied (we will use a bash script for this as a one off activity)
- Terraform accesses this Storage account via a Shared Secret key. This needs to be protected and not held in a script or certainly not stored in a Git Repository, we will explore options for storing this Key.
The first thing we need to do is create our storage account and container that will store our Terraform State File as follows by running the following Bash script:
#!/bin/bash
RESOURCE_GROUP_NAME=jonnychipz-infra
STORAGE_ACCOUNT_NAME=jonnychipztstate
CONTAINER_NAME=tstate
# Create resource group
az group create --name $RESOURCE_GROUP_NAME --location uksouth
# Create storage account
az storage account create --resource-group $RESOURCE_GROUP_NAME --name $STORAGE_ACCOUNT_NAME --sku Standard_LRS --encryption-services blob
# Get storage account key
ACCOUNT_KEY=$(az storage account keys list --resource-group $RESOURCE_GROUP_NAME --account-name $STORAGE_ACCOUNT_NAME --query '[0].value' -o tsv)
# Create blob container
az storage container create --name $CONTAINER_NAME --account-name $STORAGE_ACCOUNT_NAME --account-key $ACCOUNT_KEY
echo "storage_account_name: $STORAGE_ACCOUNT_NAME"
echo "container_name: $CONTAINER_NAME"
echo "access_key: $ACCOUNT_KEY"
Once this has run we need to make a note of the exported values for use later:
storage_account_name: jonnychipztstate
container_name: tstate
access_key: +uRmL73LSnXvSEGMG9pd26R28qvgFS9z3BcZrg+NHAExrs9HkRhOjNGWxT9c/J0iDcwF2t+txjCf0ZfDayV6pw==
The access_key attribute is the name of our state file created automatically from the initial run, spot the ‘/’ forward slash, this is giving a path to the file.
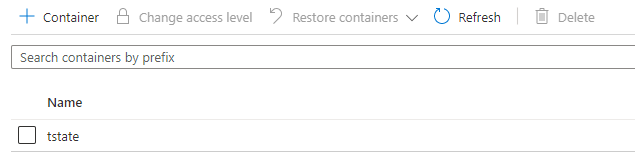
If we check our Azure subscription, we can now see we have the storage account and container created ready to store our Terraform State file:

Configure state backend – Terraform
Great, so our next task is to modify our main.tf Terraform script to enable Terraform to utilise this shared state location and accessing it via the Key Vault by configuring what is known as the ‘state back end’. As mentioned previously, we could put the Storage Account access key directly into our Terraform file, but clearly that is not best practise as we will be storing out main.tf in a Git Repo so that would be a security concern so hence the Key Vault!
For now, until we move into the Azure DevOps Pipelines we will create the backend config with the raw Access Key, to demonstrate
we just need to add the following to our terraform main.tf file to allow terraform to stare the state file in a certral location, our Azure Storage Account.
  backend "azurerm" {
    resource_group_name   = "jonnychipz-infra"
    storage_account_name  = "jonnychipztstate"
    container_name        = "tstate"
    key                   = "+uRmL73LSnXvSEGMG9pd26R28qvgFS9z3BcZrg+NHAExrs9HkRhOjNGWxT9c/J0iDcwF2t+txjCf0ZfDayV6pw=="
}
If we now run Terraform INIT and Terraform PLAN, we should see that we successfully create a Plan:

And in fact, our state file now does not exist locally, if we check the container of our storage account in Azure, here it is!

Success!
Make sure you commit and push your changes to your GitHub Repo, for the purposes of this part, I have included a ‘.gitignore’ file, in order to ensure no files such as the the Terraform Provider EXE is uploaded into Github.
4 – Azure DevOps Organisation
Ok, so the next part of our journey now that we have successfully deployed our infrastructure using a shared location for our Terraform State, is to look to automat this based on the checking trigger to the ‘main’ GitHub repo branch.
We also need to ensure we remove the Storage Account Access Key as part of the following process.
The first thing we need to do is set ourselves up with an Azure DevOps Organization by visiting the following site:

I have set myself up with an Organisation as follows:

Jonnychipz-dev and Terraform-Testing are the Organisation and Project I have created for the purposes of this article.
5 – Azure DevOps Pipeline
The first thing we are going to do is create a service principle name (SPN) to allow our Azure DevOps Organisation project to deploy our environment.
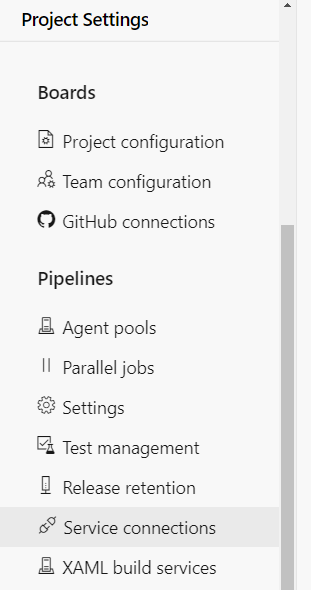
Within our Azure DevOps Project we can select Project Settings -> Service Connections:
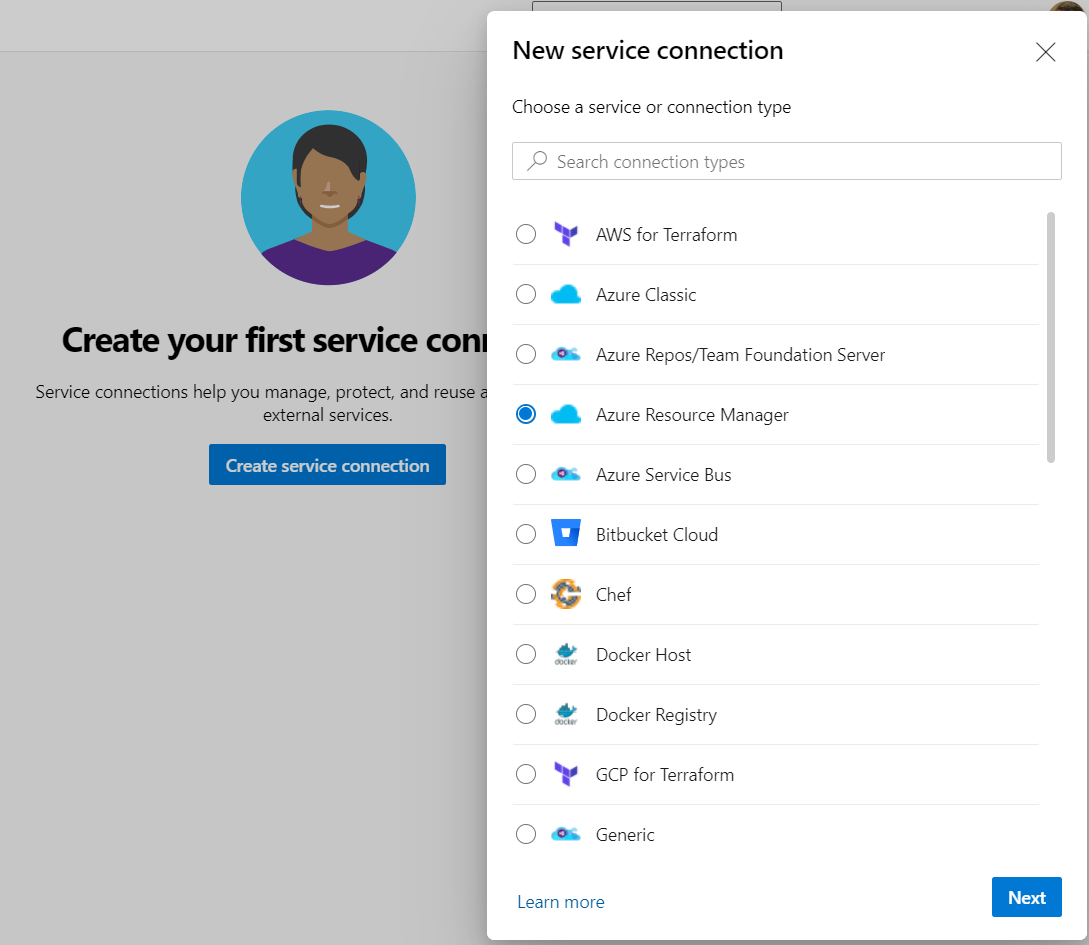
Click Create Service Connection -> Azure Resource Manager -> Next:
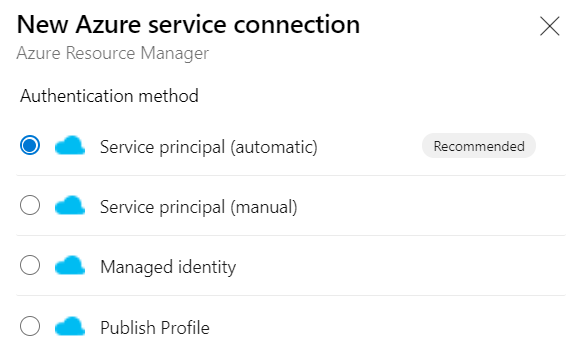
Then Select Service principal (automatic) -> Next:
These are the scope settings for my SPN that were used:

You can confirm configuration of your SPN by reviewing the following output:L
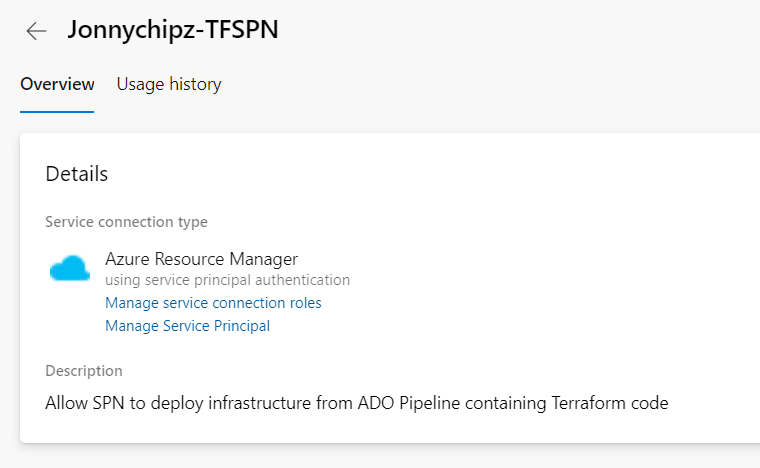
Here is our Managed Service Principal in Azure:

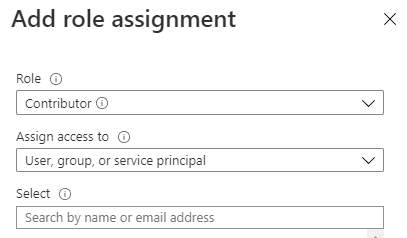
The next thing for the purposes of this article is that I am going to allow this SPN COntributer access to my sibscription:
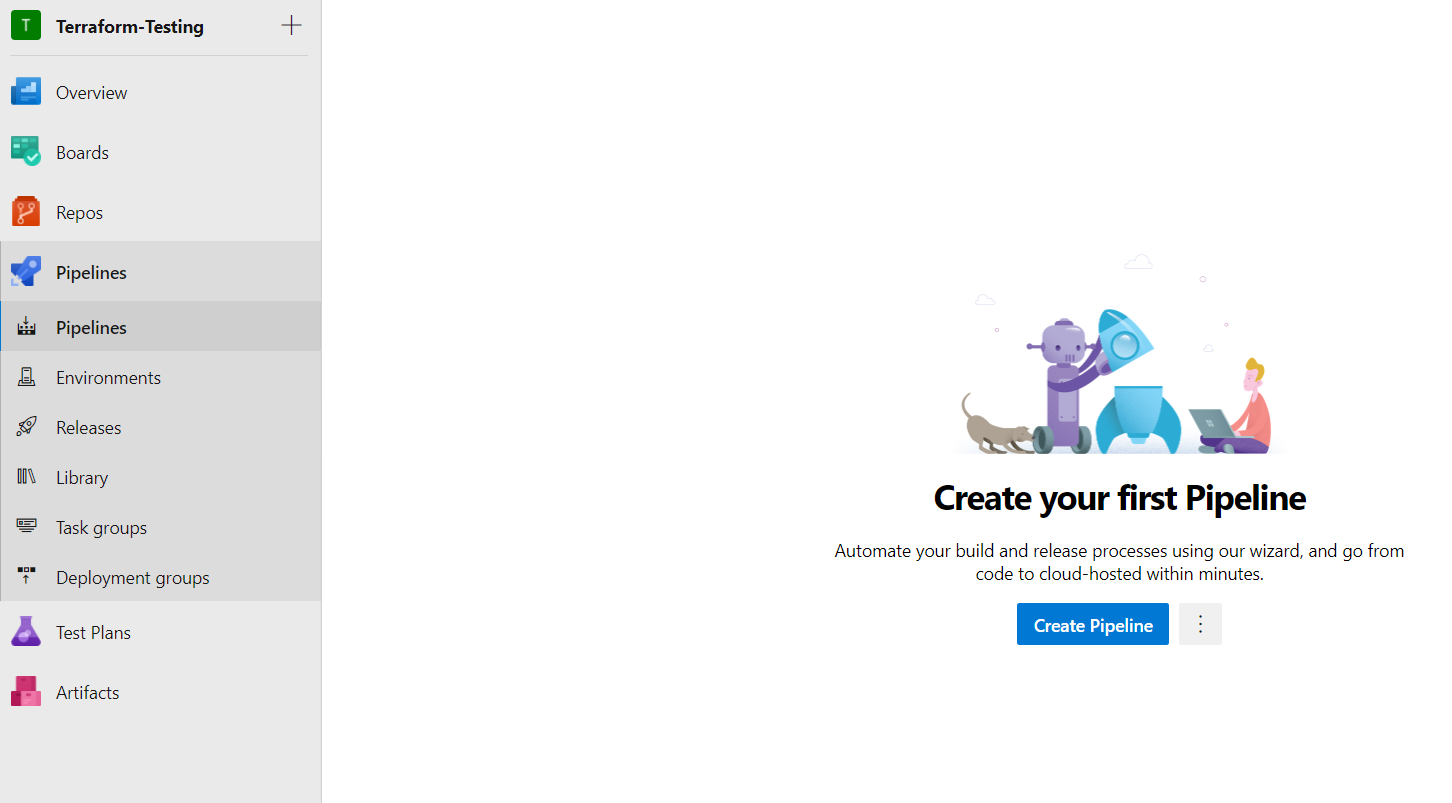
With all that in place its now time to create our pipeline
Select Pipelines -> Create Pipeline:
Select GitHub:
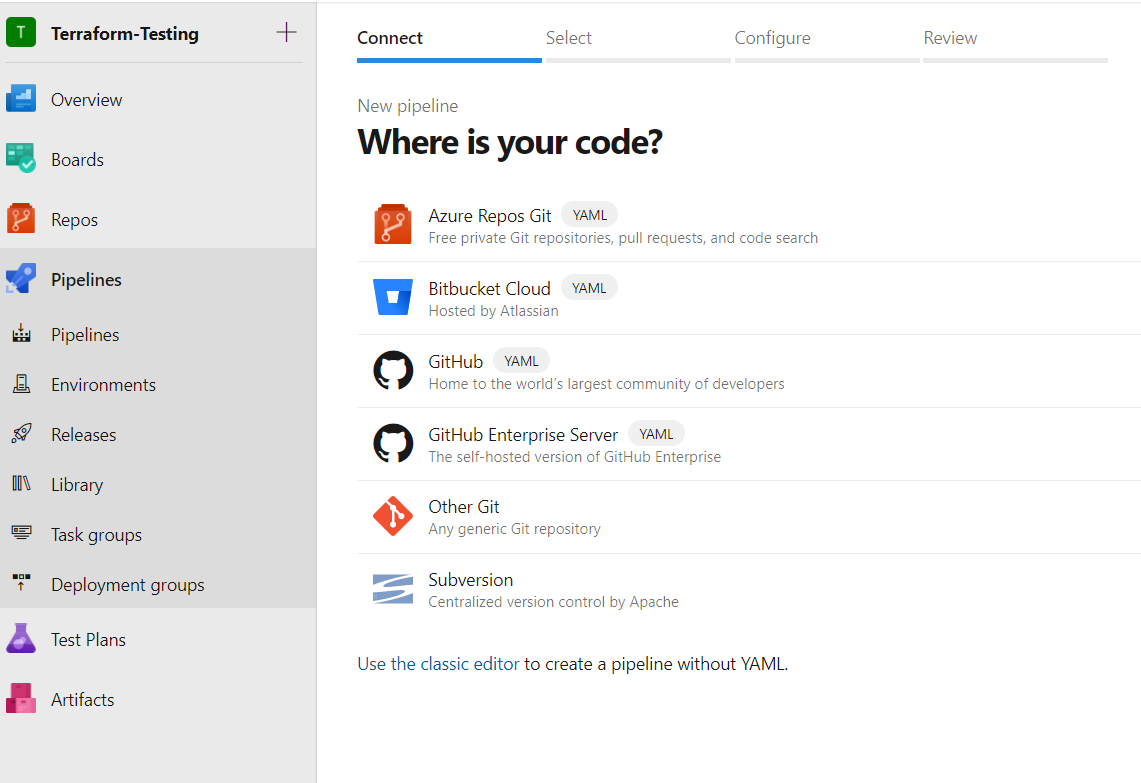
For this example I will use the classic editor as it saves a little processing of YAML files if you are not familiar with those.
Select Github and logon:
Logon to your GitHub Account:

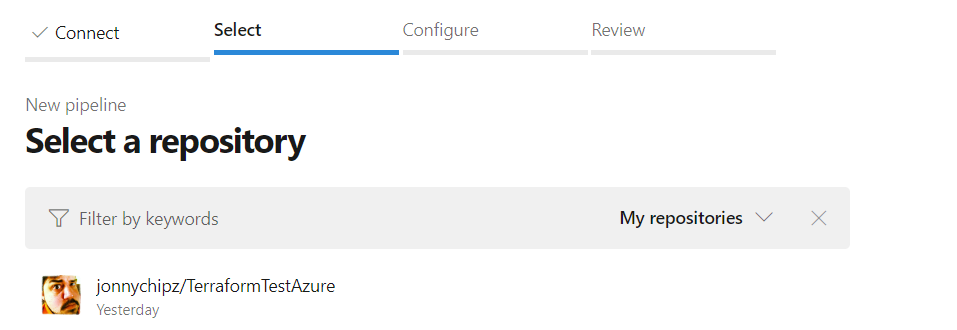
Scroll down to Repository Access and select your repo, then click Approve and install:

This will authorise ADO to access your GitHub Repo, next we want to select Github:

For the purposes of this article we will set up a single stage to our pipeline which will run through :
- Install Terraform
- Run Terraform INIT
- Run Terraform PLAN
- Run Terraform VALIDATE & APPLY to deploy our infrastructure to our subscription.
The trigger for this pipeline run will be the commit of code to our ‘main’ branch in our repo.
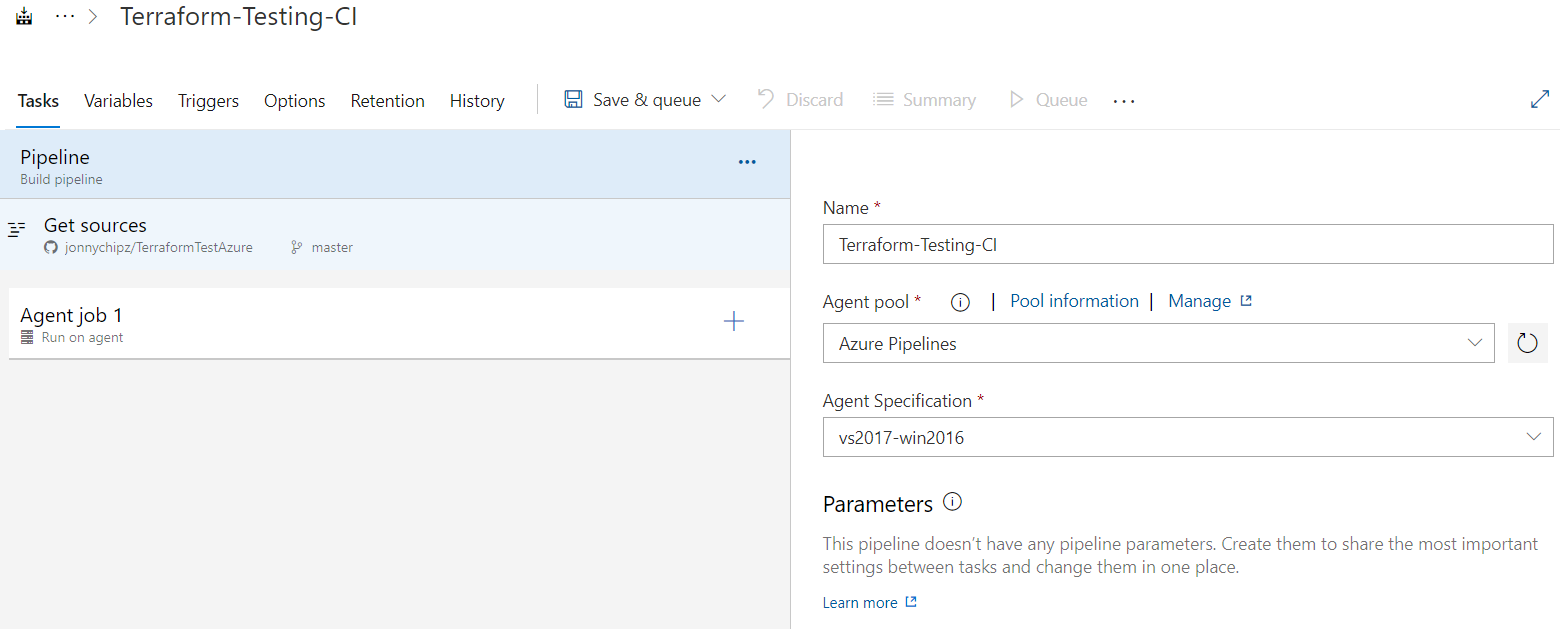
We will select an Empty Pipeline to start creating our pipeline:

We are then presented with a pipeline to start building:
Next we want to select each Task and configure as follows.
Install Terraform:

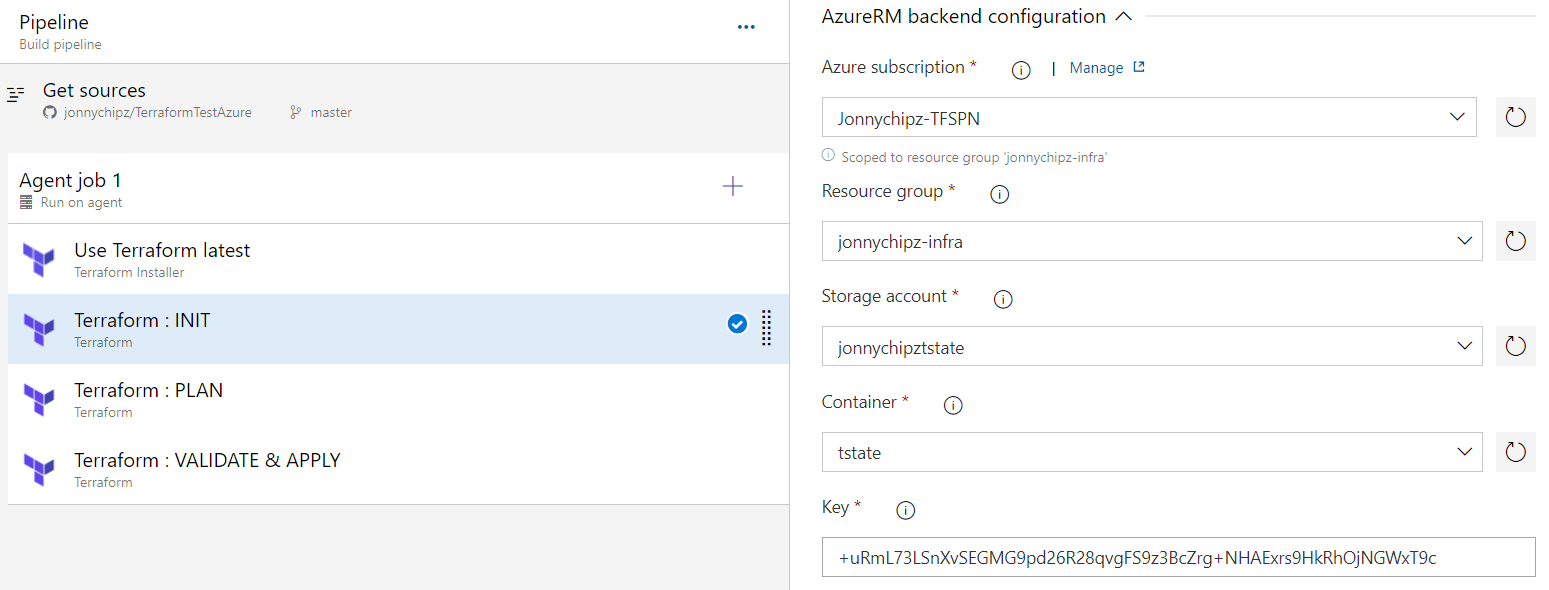
Terraform: INIT
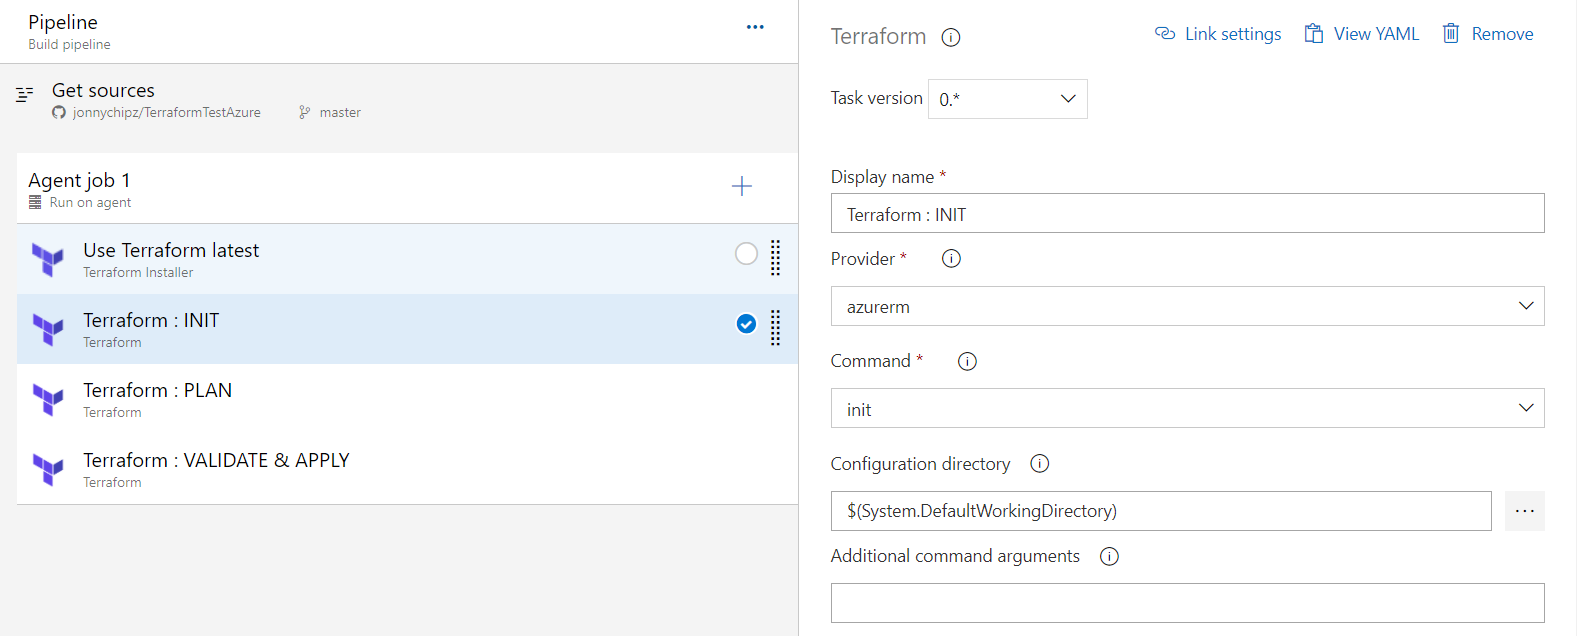
In this task, we can configure the Terraform Backend that we have in our main.tf as follows:
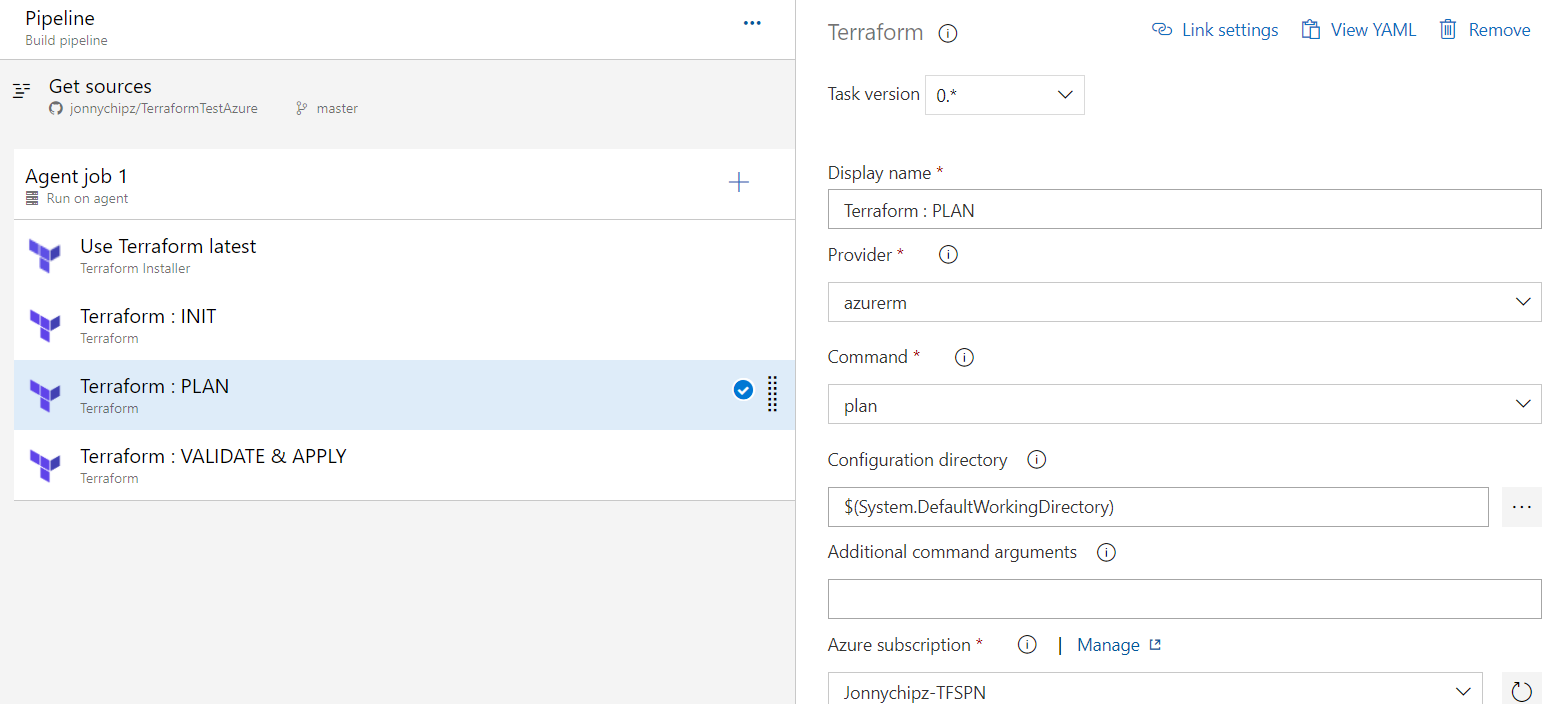
Terraform: PLAN
Terraform VALIDATE & APPLY
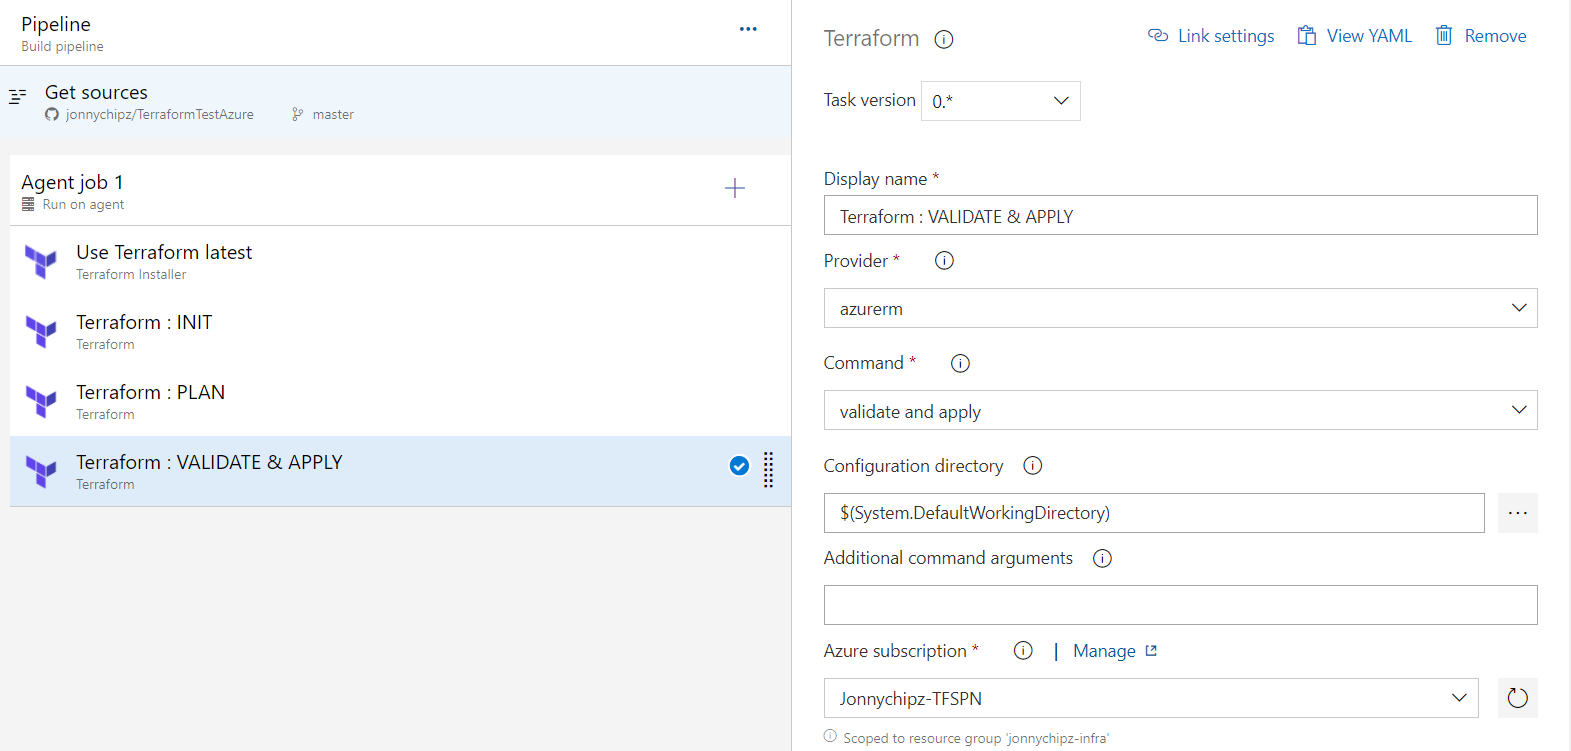
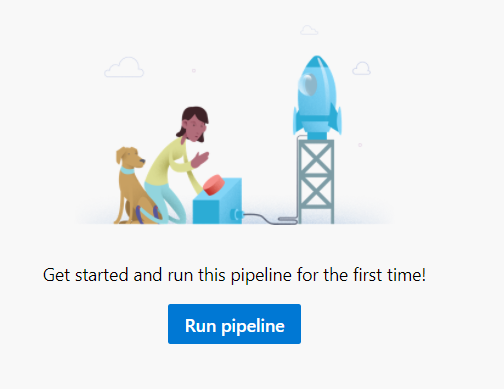
Once we have completed that configuration we can save it and we are presented by a pipeline yet to be run:
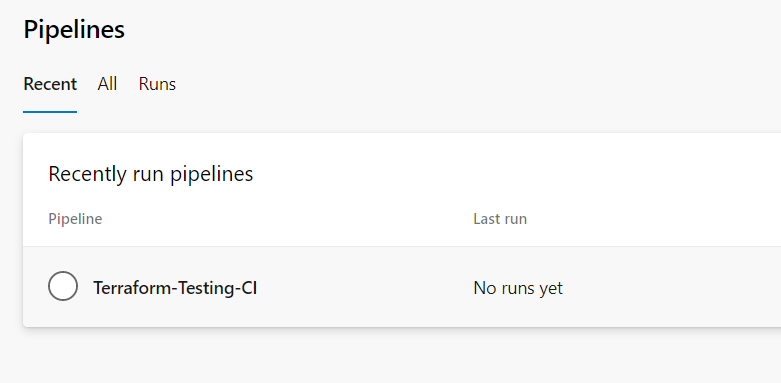
So, before we run our pipeline we could manually kick this off by selecting:
However, in the spirit of CI/CD we can modify the CI enabled flag on our pipeline here:
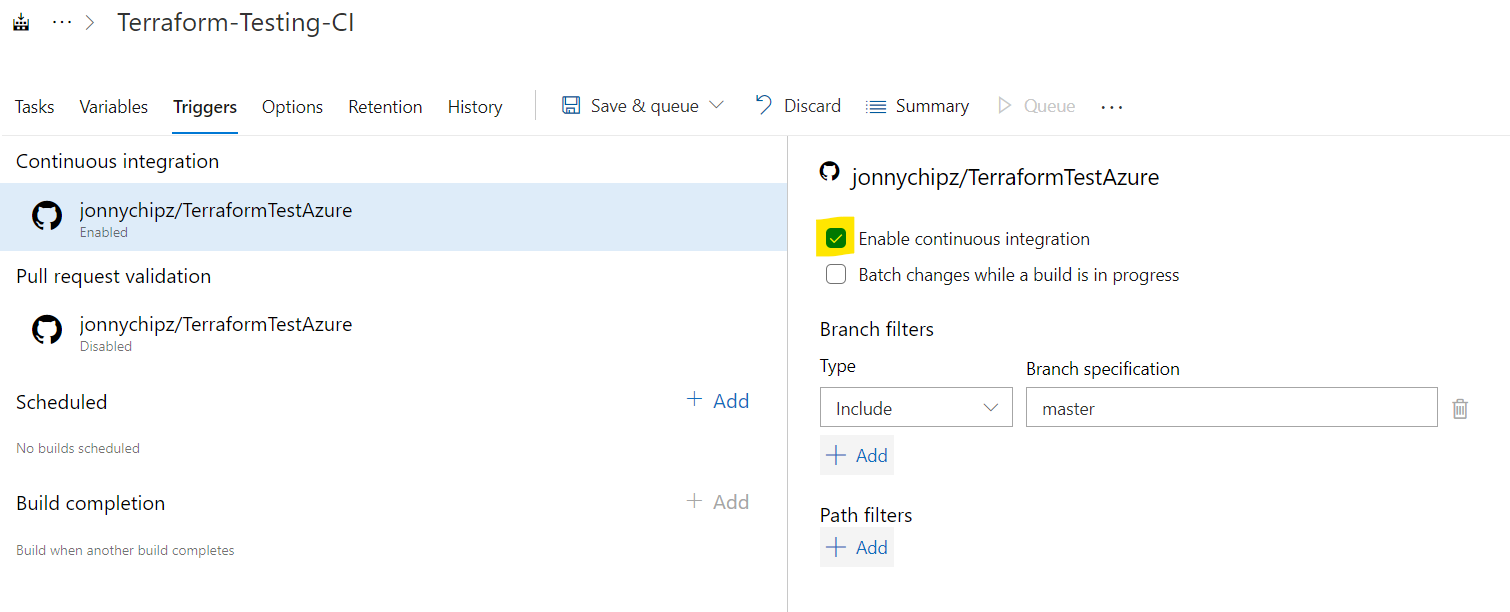
Now when we modify our code and commit it to our ‘master’ branch in GitHub this Pipeline should run and deploy our environment for us………
I commit a change via VS Code:
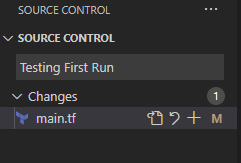
And Push to my GitHub Repo:

There we have it, our pipeline is triggered by the commit and push.

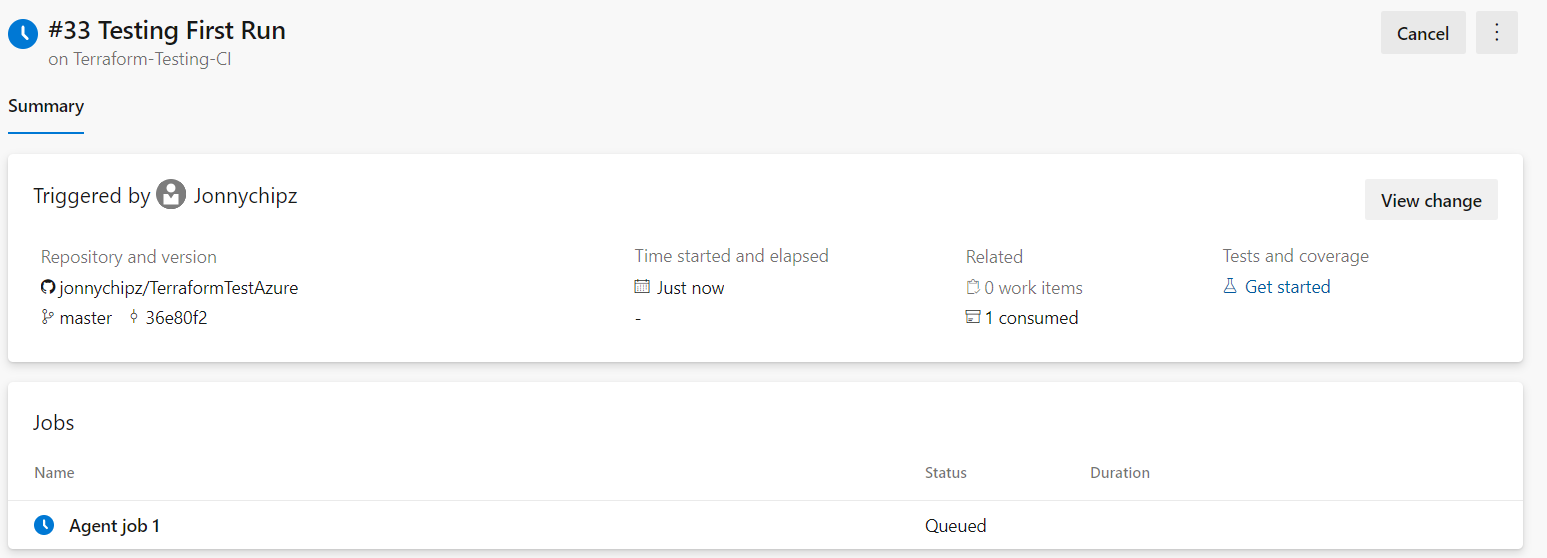
We wait for all our tasks to complete (and hope we dont have any errors!)

Our Job has completed successfully.
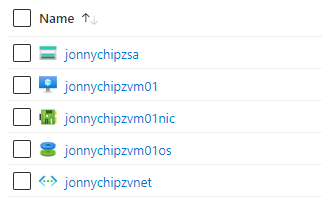
If we check our Azure Subscription, we can see that our Application infrastructure has been deployed as we would expect!
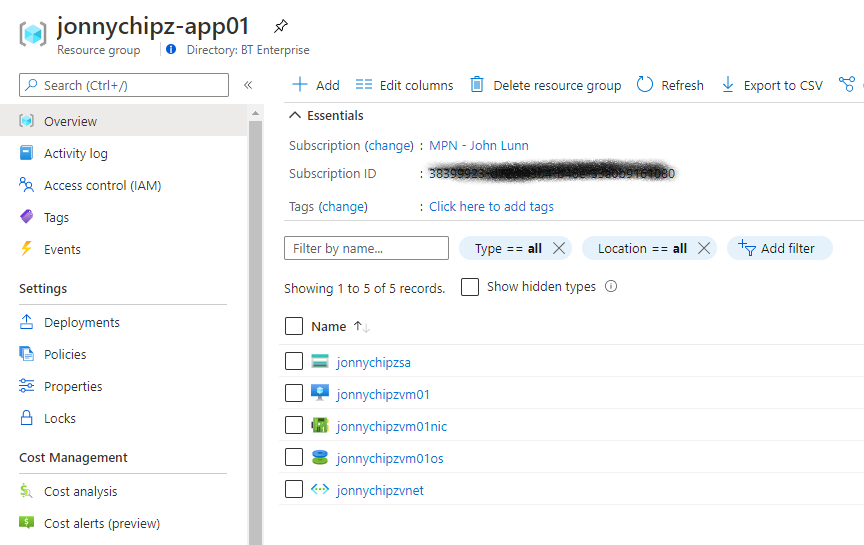
SUCCESS!
Conclusion
If you have followed me through to the end of this article, well done and thank you! I really hope this has been useful to aid you in creating your first Azure DevOps Pipeline!
We haven’t explored YAML in this article, but the concept that the pipeline is actually created as a file with a .yaml extension leads to even more interesting concepts which I won’t delve into here!
Next steps from here would be to explore yaml, and the ability to check yaml into your Git Repo.
Maybe we could explore the ability in Azure DevOps to apply branch protection, in reality, you probably wouldn’t be committing changes directly into the ‘main’ or ‘master’ branch. So we can do clever things like ensure approvals and Pull Requests are raised to ensure our main application isn’t accidently written over.
Anyway, congratulations on reaching the end and good luck with future work!
Books related to this article

Very informative article, and I was able to successfully implement for myself. Well done mate!
LikeLiked by 1 person
Thank you for your work and this detailed and professional review.
LikeLike
Did you ever run into this problem?
Error: Error building ARM Config: obtain subscription(REMOVED) from Azure CLI: Error parsing json result from the Azure CLI: Error waiting for the Azure CLI: exit status 1
LikeLike
Hmmmm no I didn’t…….. I would check that your az cli is up to date and maybe just rerun az login and set the subscription if you have more than one using az account set
LikeLike
In the back end configuration, isn’t “key” just used as the file name? IE: mine is key = “terraform.tfstate”. I believe you should use access_key = for that purpose instead.
LikeLiked by 1 person
Hey Josh yea you are 100% correct I made the mistake when running the code and mistook the key variable for the storage account access key doh! Technically it doesn’t really matter In the slightest just never got around to updating the screen shots and text…….. but yes generally you would use terraform.state or something like that!!!! Good spot 😉
LikeLike
Hi ,
How to get a Email Notification to some one who triggered the pipeline as successfully resource is created and ready for use.
LikeLike
I followed your steps but got following error
│ Error: Error ensuring Resource Providers are registered.
│
│ Terraform automatically attempts to register the Resource Providers it supports to
│ ensure it’s able to provision resources.
│
│ If you don’t have permission to register Resource Providers you may wish to use the
│ “skip_provider_registration” flag in the Provider block to disable this functionality.
│
│ Please note that if you opt out of Resource Provider Registration and Terraform tries
│ to provision a resource from a Resource Provider which is unregistered, then the errors
│ may appear misleading – for example:
│
│ > API version 2019-XX-XX was not found for Microsoft.Foo
│
│ Could indicate either that the Resource Provider “Microsoft.Foo” requires registration,
│ but this could also indicate that this Azure Region doesn’t support this API version.
│
│ More information on the “skip_provider_registration” flag can be found here:
│ https://registry.terraform.io/providers/hashicorp/azurerm/latest/docs#skip_provider_registration
│
│ Original Error: Cannnot register providers: Microsoft.ContainerService. Errors were: Cannot register provider Microsoft.ContainerService with Azure Resource Manager: resources.ProvidersClient#Register: Failure responding to request: StatusCode=403 — Original Error: autorest/azure: Service returned an error. Status=403 Code=”AuthorizationFailed” Message=”The client ‘d568a9f3-a5df-4ab5-b3b7-66b5b4669f36’ with object id ‘d568a9f3-a5df-4ab5-b3b7-66b5b4669f36’ does not have authorization to perform action ‘Microsoft.ContainerService/register/action’ over scope ‘/subscriptions/69a7f083-ff5c-4879-82ce-7dda466b58b3’ or the scope is invalid. If access was recently granted, please refresh your credentials.”.
│
│ with provider[“registry.terraform.io/hashicorp/azurerm”],
│ on main.tf line 17, in provider “azurerm”:
│ 17: provider “azurerm” {
LikeLike
IN THE TERRAFORM APPLY COMMAND WE NEED TO INVALIDATE THE existing function our iirc is done with a flag on terraform apply command terraform at the moment doesnot know it needs to re-deploy the function because it thinks nothing has changed
Could you tell what script can we edit to re-deploy it
LikeLike
Hi @jonnychipz ,
I tried to set these variables by running these on command prompt after connecting to my subscription
#Set Variables for Storage account and Key Vault that support the Terraform implementation
RESOURCE_GROUP_NAME=jonnychipz-infra
STORAGE_ACCOUNT_NAME=jonnychipztstate
CONTAINER_NAME=tstate
STATE_FILE=”terraform.state”
but I am not able to. I have to hard code and run it like this –
az group create –name jonnychipz-infra –location uksouth
The error I am getting is –
C:\Users\>RESOURCE_GROUP_NAME=jonnychipz-infra
‘RESOURCE_GROUP_NAME’ is not recognized as an internal or external command,
operable program or batch file.
I am new to this , can you please help me.
LikeLike
Hi @jonnychipz
I am trying to set the variables as shown in the video by using azcli but I am not able to –
#Set Variables for Storage account and Key Vault that support the Terraform implementation
RESOURCE_GROUP_NAME=jonnychipz-infra
STORAGE_ACCOUNT_NAME=jonnychipztstate
CONTAINER_NAME=tstate
STATE_FILE=”terraform.state”
I have to hard code my command to create the resources-
az group create –name jonnychipz-infra –location uksouth
The error I am getting is –
C:\Users\AzureRepos>RESOURCE_GROUP_NAME=jonnychipz-infra
‘RESOURCE_GROUP_NAME’ is not recognized as an internal or external command,
operable program or batch file.
I am new to this , Can you help me .
LikeLike
That was written in a bash script, basically a Linux cmd line, you could either try configuring WSL on your windows PC and use the bash shell, or you can declare your are setting Environment variables by putting the word ‘set’ before each variable name. Hopefully that makes sense!
LikeLike